

What is Work Map Pro?
What can you do with the Work Map Pro Tool?
Quick Reference Guide
Getting Started
Create Work Maps
Tool Controls
![]() Create Image Catalog
Create Image Catalog
![]() Print
Print
![]() Preview
Preview
![]() Remove Graphics
Remove Graphics
![]() Select All Printable Panels
Select All Printable Panels
![]() Clear Selection
Clear Selection
PDF Export Toolbar
![]() PDF Export
PDF Export
Load Additional Data Toolbar
![]() DFIRM Layer Data Loader
DFIRM Layer Data Loader
![]() DFIRM Reference Data Loader
DFIRM Reference Data Loader
![]() Show DFIRM Adjacent Area
Show DFIRM Adjacent Area
![]() Show Only DFIRM Area
Show Only DFIRM Area
Trouble – Shooting
Contacts
Work Map Pro Tool is a user-friendly application designed to run within ArcMap. With this application, you can effortlessly create work maps. An advantage of this application is that you can preview your plots before printing. Another advantage is that you can batch print plots for multiple panels.
The design of this application consists of a window with tools and menu options that are easily accessible in ArcMap. Each tool serves to simplify the creation of work maps. Many tools appear similar to existing ArcMap tools for easy recognition. For instance, the Print tool creates a PDF file of selected panel(s).
| You can create a preview of the work map for a selected panel using the Preview tool. |
|
You can print a work map to PDF for an individual panel or multiple panels using the Print tool. |
|
| You can remove all the graphics using the Remove Graphics tool. |
|
You can select all the printable panels using the Select All Printable Panels tool. |
|
| You can create raster catalogs using the Create Image Catalog tool. This creates a raster catalog from all the images located in a directory. The output is stored in the directory where the images are located. |
|
You can deselect all of the panels you have selected for printing using the Clear Selection tool. |
|
The following is a quick reference guide to all the tools available on the Work Map Pro Tool. In addition, positioning your cursor over the tool will display the name of the tool.
|
Work Map Pro toolbar |
|
Panels window: Lists panels available for currently selected layer |
|
|
Create Image Catalog | Makes a catalog of raster data |
|
|
Prints map document to PDF | |
| |
Preview | Creates preview of panel selected for printing |
|
|
Remove Graphics | Removes all graphics |
|
|
Select All Printable Panels | Selects all panels that can be printed |
|
|
Clear Selection | Clears selected panels |
It is important that a few key tasks have been completed prior to creating work maps using Work Map Pro. There are specific components of the DFIRM database that must be completed prior to using this tool. They are:
This section describes how to create a work map using the Work Map Pro toolbar.
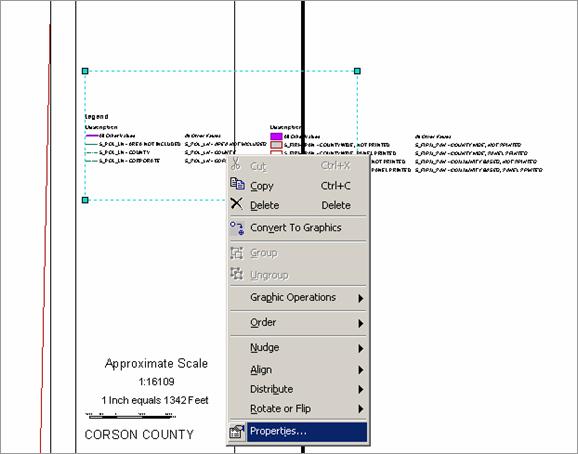
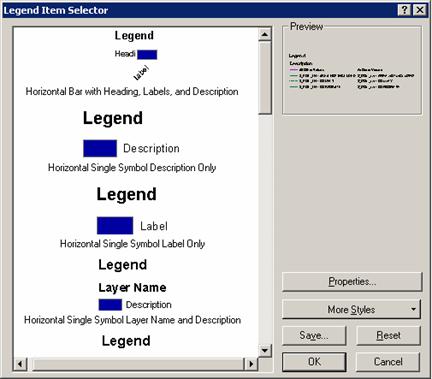
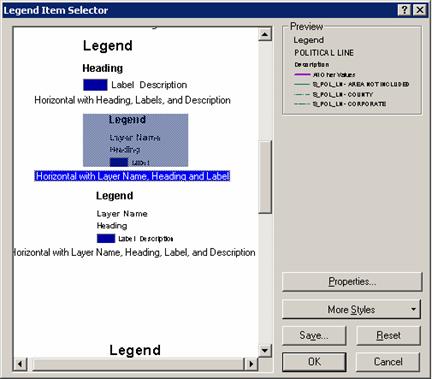
Note: If you wish to label the features, this can be done by right-clicking on the feature class in the table of contents and selecting Label. Predefined labels have been set for you. If you wish to modify these, then right-click on the feature class in the table of contents and select Properties, from which you can advance to the Labels tab and alter the labels.
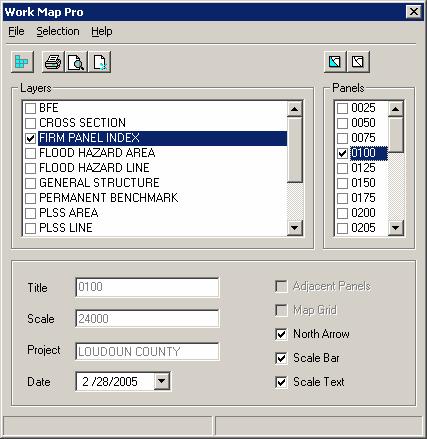
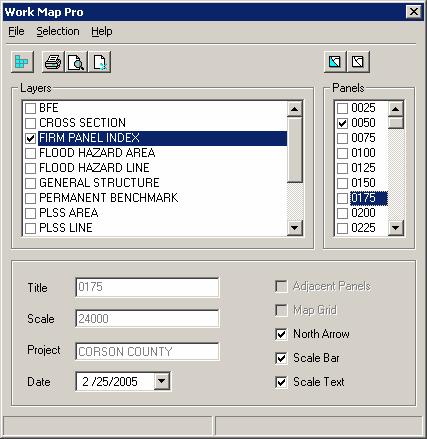
| Panel Number (Title) and scale for the selected panel. |
|
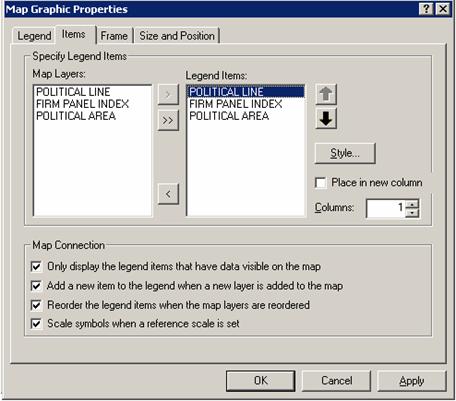
Check elements you want to have on the work map(s) for the panel(s) you have selected. |
You will notice that the information for the title and scale will change as you select panels. These fields show the information for the currently selected panel. You can modify the information by clicking the fields and replacing the existing information.
Note: If multiple panels have been selected, changes made to the title and scale will be applied only to the first selected panel. Subsequent panels selected will have the original panel information.
You can also use the Select All Printable Panels button to have the application select all the panels that are printed.
You can also change the map elements that appear on the work map, such as adjacent panel information, map grid, and north arrow. Check the elements you would like to include. Note that these changes will be applied to all of the selected panels.
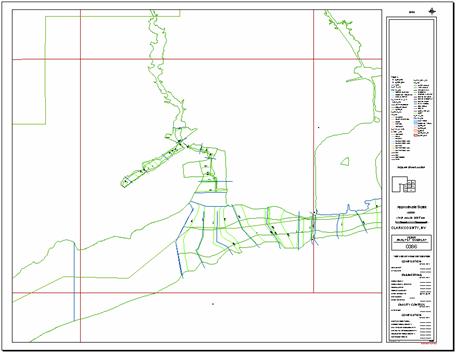
Note: The print properties have been set to create a PDF file in landscape format, 44 inches by 34 inches (ANSI E). The PDF file can be downloaded for printing.
The Preview and the Print output should look like the following:
This section describes the functionality of each of the tools in the Work Map Pro toolset.

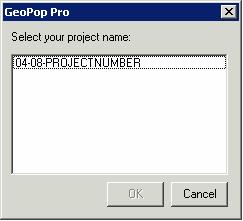
Creates an image catalog from the images located in a directory. To display the catalog, the layer must first be added using the DFIRM Reference Data Loader button.
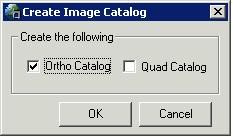
Select the name of the project that contains the images for which you want to create a catalog, as shown below.
Generates a PDF file of the selected panel with the selected layout elements. If multiple panels have been selected, the tool will batch print all the selected panels. At least one panel must be selected.
Creates a preview of the work map in the layout view. If multiple panels have been selected, the tool will create a preview of the current selected panel
Note: Do not preview the panel you just modified as it will cause a re-draw and your style changes will be lost.
Removes all graphics from the layout. From the Work Map Pro window, click Remove Graphics.
Selects all printable panels. When a panel is selected, the details such as title, scale, and project are displayed in the bottom half of the Work Map Pro window.
From the Work Map Pro window, click Select All Printable Panels.
Clears all panel selections.
From the Work Map Pro window, click Clear Selection.
![]()
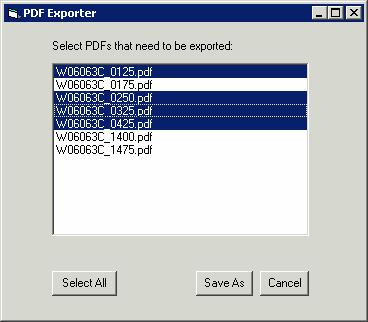
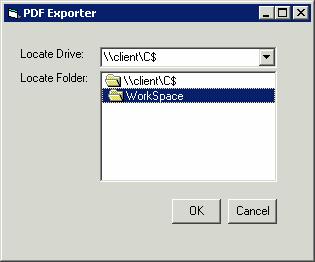
Once you have printed your selected panels to PDF, you can retrieve them and save them to a local drive or server using the PDF Export Tool. You can print the PDF work maps to your local plotter, share them electronically, or store them in an archive.
Allows users to download single or multiple PDF files. Use this tool after printing panels to PDF using Work Map Pro’s Print button.
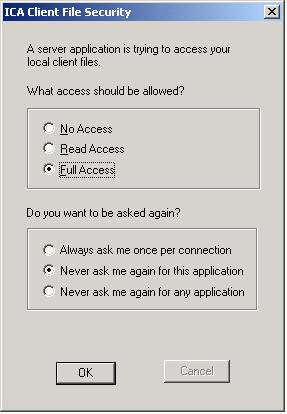
You may see a dialog box like the one on the following page asking you what access should be allowed to your local files. Select the settings you would like to allow, choose your options to be reminded, then click OK.
The tools on the Load Additional Data Toolbar allow users to add data to their ArcMap session that is not added automatically as part of the standard DFIRM layers. Data that a user may wish to add includes raster catalogs of DOQs/Quads, contour lines, effective panel layout schemes, and any of the enhanced SDE feature classes.
|
|
DFIRM Layer Data Loader | Adds additional layers and tables from the SDE geodatabase |
|
|
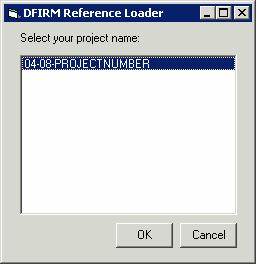
DFIRM Reference Data Loader | Adds reference data to the map view |
|
|
Show DFIRM Adjacent Area | View adjacent DFIRMs |
|
|
Show Only DFIRM Area | Remove view of adjacent DFIRMs |
Available Data Layers: list of any features that are part of the SDE geodatabase that can be added. Select features from the Available Data Layers box and hit the add arrow to add them to the list of features to be added to ArcMap. |

|
To-be-loaded data layers: list of all features that will be added to ArcMap. Will add all standard layers to ArcMap (done by default). |
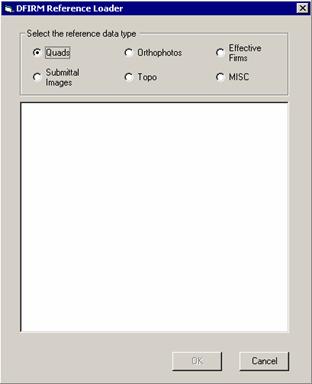
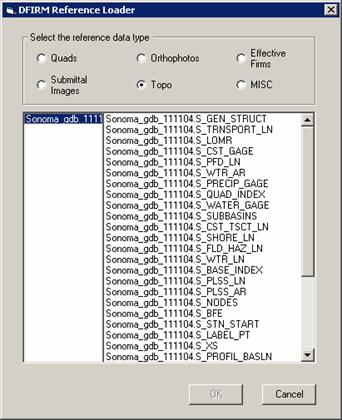
Used to add any additional reference data that does not reside in the SDE geodatabase. This includes: raster catalogs (DOQs or USGS Quads), topo (contour lines), and effective map layouts.
Select type of reference data to load: |
|
If the user selects the “Topo” or “MISC” radio button, then they will receive the following message:
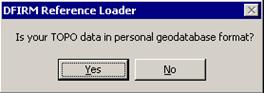
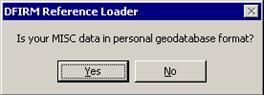
If the user selects “Yes”, then the dialog changes to the following, where the user can pick the personal geodatabase and then will be able to choose the feature classes from that geodatabase:
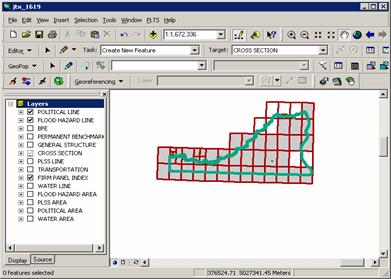
Click on this button to show data for adjacent areas. If data for adjacent areas is loaded into the database, it will be shown. You will not have permission to edit any data in an adjacent area; it is only shown for your reference. Once you select the button, its icon will change to that of the Show Only DFIRM Area tool.
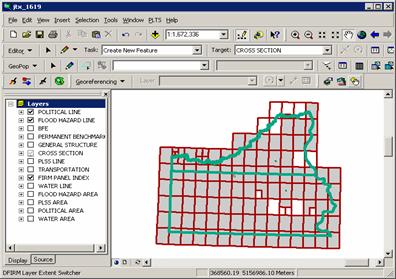
Click on this button to remove data showing for adjacent areas. Once you select the button, adjacent data will disappear and the button icon will change to that of the Show DFIRM Adjacent Area tool (see above).
Problem: The text in the panel layout is too large and extends past the bounding box.
Solution: Check the units of your page size under Page Setup. The measurements should be in inches, not centimeters or points.
Problem: The panel that is generated when I create the layout is not the same panel that I have checked off in the panel box.
Solution: In the panel selection box, those panels that are checked will be printed, but the panel that is selected (highlighted in blue) will appear in the generated layout.
|
Checked panels will be printed to PDF.
|
If you need assistance with this tool, please contact the representative at your local RMC.
Click here to view a list of Regional Service Center Contacts.