What is JTX?
Quick Reference Guide
JTX Key Concepts
What are JTX Users/Groups?
JTX Jobs/Job Types
DFIRM Study (STDY)
Getting Started
User Request Process
Data Submission Process
Set Access Level
Tool Controls
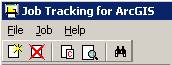
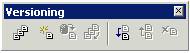
JTX Toolbar
![]() Create New Job
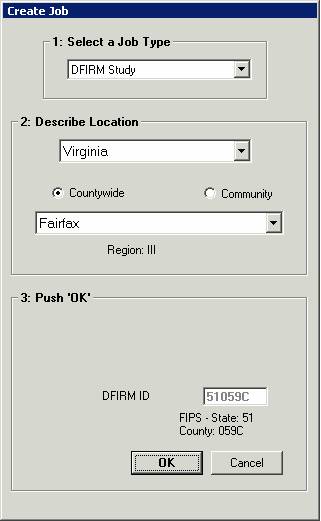
Create New Job
![]() Cancel Job
Cancel Job
![]() Create Child Jobs
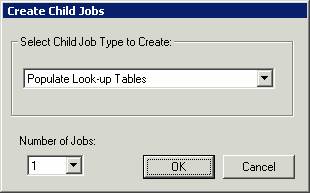
Create Child Jobs
Reconcile and Post
![]() Show Child Jobs
Show Child Jobs
![]() Find Job
Find Job
JTX Menu
File
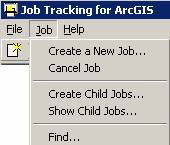
Job
Help
Job Query Window
Admin Queries
Group Queries
Personal Queries
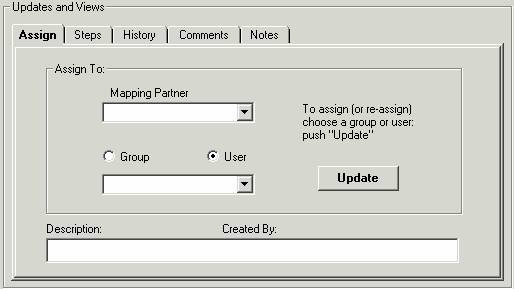
Updates and Views Section
Assign Tab
Steps Tab
History Tab
Comments Tab
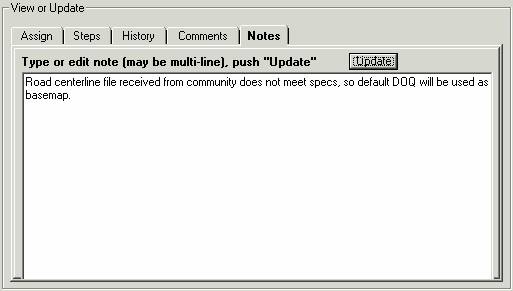
Notes Tab
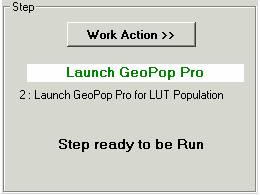
Step Actions Section
Run Current Step
Mark Current Step Done
Uncheck Previous Step
Close Job
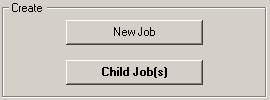
Create Job Section
Additional JTX Toolbars
Rendering/Symbology Toolbar
![]() Rendering using VVT Symbology
Rendering using VVT Symbology
![]() PLTS Dangle and Pseudo Renderer
PLTS Dangle and Pseudo Renderer
![]() Default Renderer
Default Renderer
![]() Set Polygon Transparency Percentage
Set Polygon Transparency Percentage
Load Additional Data Toolbar
![]() DFIRM Layer Data Loader
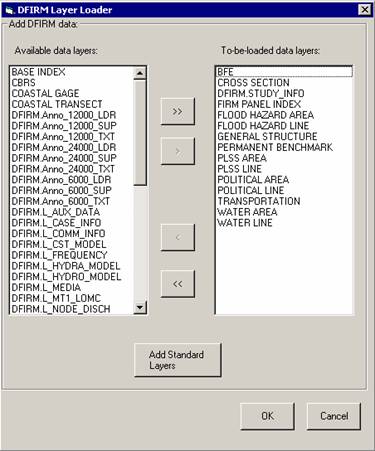
DFIRM Layer Data Loader
![]() DFIRM Reference Data Loader
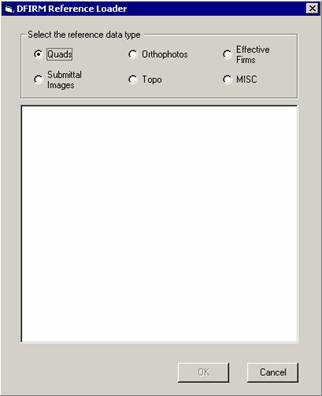
DFIRM Reference Data Loader
![]() Show DFIRM Adjacent Area
Show DFIRM Adjacent Area
![]() Show Only DFIRM Area
Show Only DFIRM Area
Trouble-Shooting
Contacts
JTX, an ESRI application, is a workflow management application that follows a job throughout its entire lifecycle. It allows for the creation, management, and termination of jobs. JTX supports job tracking by maintaining a detailed job history table that will include user identification, task worked on, and date of work. Each job type has a standardized set of steps that the users must work through before the job can be considered complete. As the job progresses through the lifecycle, users are provided with data and tools to assist in the completion of the task. JTX also assists in the allocation of resources by managing users and user groups. Jobs may be assigned directly to a specific user or a user group. All DFIRM production tools will be accessible through a step in the JTX workflow.
The following is a quick reference guide to all of the components of JTX.
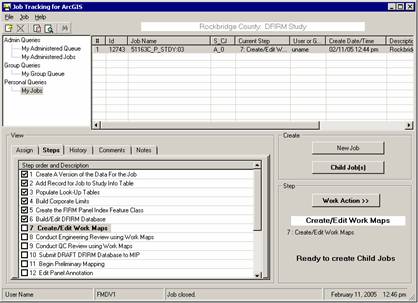
|
Displays all current jobs sorted by privilege (admin, group and personal) Updates and Views Section; Allows users to assign jobs, view job steps, view job history, and add comments or notes. |
|
JTX Job(s): List of jobs in the selected queue |
||
| User | Message box | Date / time (EST) | ||
A JTX User is any person that has access to and will be working within the JTX environment. Each User must have his/her own user name set for job assignment and tracking purposes.
A JTX Group is a set of Users that share a common role and typically work in the same department (e.g. Engineering, QA/QC, Mapping, etc.). Groups are used for two reasons: to control privileges and to provide a queuing mechanism for jobs. There will be two Groups per department − one Admin and one Analyst, which will be given different permissions depending on their role in the workflow.
A Mapping Partner is a collection of Groups and Users that work for the same company (e.g. Baker, Watershed, etc.).
Admin Groups will be able to create jobs, assign jobs to any User or Group, and close jobs at the end of the workflow. Admins can also assign jobs to other Mapping Partners.
Analyst Groups will only be able to assign jobs within their Group or to their Admin. Analysts cannot create parent or child jobs.
A job is a unit of work to be performed on a particular set of data by one or more people. A job type is a logical grouping of steps and layers required to perform a particular task, and it is also used to streamline the workflow.
One job type has been created for this implementation – DFIRM Study.
This job type includes any DFIRM Production work. Currently, the 42−step workflow extends through the submission of the preliminary DFIRM database to the MIP. As more tools are added to the environment, the workflow will be extended.
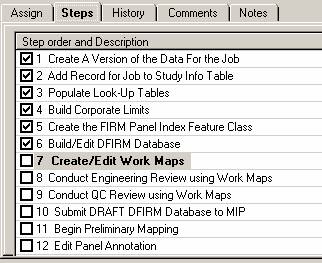
|
Step 1 is completed automatically when a job is created. |
| First 12 steps for a DFIRM Study Job | |
Contractors who wish to use the environment must complete a login request form that can be found at: http://hazards.fema.gov/resources/dfirm.htm
Once the form is complete, it should be sent to the corresponding Regional Management Center (RMC) for the request to be processed.
If the contractor has any data they wish to use, it should be submitted to the following address for posting:
DFIRM Data
Attn: Anil Shrestha
3601 Eisenhower Avenue
Alexandria, VA 22304-6425
Please note that whenever possible, data should comply with Appendix L of the Guidelines and Specifications and should include a readme.txt file containing contact information. However, additional reference data can be included with the submission that has no Appendix L specifications (e.g. DRGs, topo data, ortho photos, other GIS data, etc.). All data that will be used for final FIRM production must be referenced in the projection.
The first time you log on to Citrix and click on the DFIRM Tools icon, you will be prompted to set your file security level. In order for tools such as the PDF Exporter to function properly, you must allow the ICA application to have “Full Access” to your computer. You can select any of the reminder options.
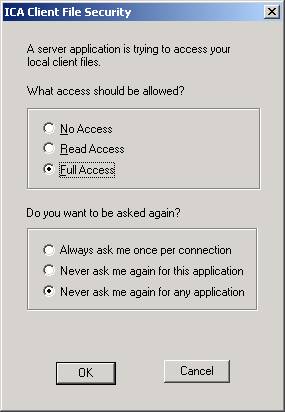
|
Allow Full Access to your local files.
Select one of the prompt options available. |
Now that you are ready to start working in JTX, you’ll need to know how each of the menus and tools work.
Opens Create Job dialog where user enters information for a new project. The dialog box is shown on the following page. Only users in Admin Groups can create a new job.
|
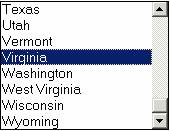
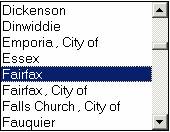
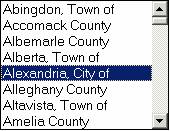
User selects Job Type, State, County, or Community from preset list, which appears in drop-down menu.
DFIRM ID is calculated automatically based on values entered in the “Describe Location” section of this dialog |
|
State: |
Cancels selected job. This may be needed if an error is detected in the initial set-up of a job (e.g. Admin accidentally selects wrong job type, State, or county/community).
You can only cancel a job that is unassigned, regardless of privileges. Only Admins will be able to cancel a job, as they are the only users capable of creating jobs.
Opens Create Child Jobs dialog, as seen on next page.
|
| Use the drop-down list to prevent typos when entering the number of child jobs to create |
Users in Admin Groups create Child jobs when a step within the Parent job can be split into multiple smaller jobs that can be assigned to different users. Whenever the Child Job(s) option is available, at least one child job must be created. This is a good way to allocate resources. For example, if you are at the Populate Look-up Tables stage and have two analysts available, you can create two child jobs so that both analysts can work on the task simultaneously populating their different tables, which increases efficiency.
Note: Any steps that involve data editing require the creation of at least one child job as a data protection measure.
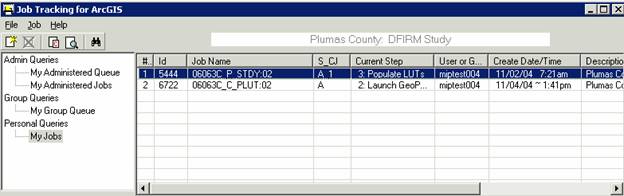
Parent and Child jobs can be identified in the Job Name field in the queries window. Parent jobs will have a _P_, as seen in the first record in the image below, while a Child job will have a _C_, as seen in the second and third records of the table below.

|
| Identify a Parent job (_P_) or Child job (_C_) in the Job Name field. |
When a child job is created, it will have its own set of steps that reflect the steps needed to complete that child job. The first of these steps is completed automatically when a version of the data is created for the user to work on, as in the workflow steps for a child job seen below:
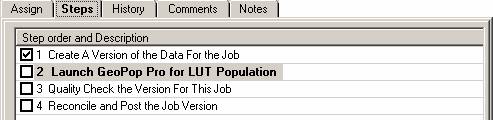
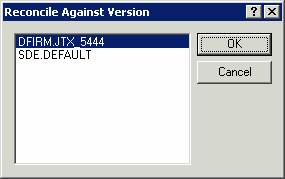
Child jobs that involve editing work have a workflow step called “Reconcile and Post the Job Version” (step number 4 in the example on the previous page). If edits have been made to data in a child job, it is critical that this step be run. Child job versions are reconciled with one another to ensure that no conflicts exist. Versions are then posted back to the Parent version of the data.
|
| Make a note of the Job ID |
|
| Reconcile to the Job ID for the job on which you are working |
Note: The Parent job will not be able to advance to the next step until all child jobs are closed. Refer to Updates and Views Section of this document for more information.
Will show all child jobs for the selected parent job.
![]()
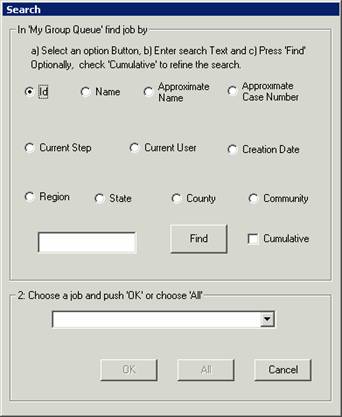
Will allow the user to search for a particular job according to certain parameters. Searches are made within a selected queue (in the example below, the search is being done on My Group Queue). Searches can be made based on job ID, job name, the number of a job’s current step, creation date, person or group to whom a job is assigned (‘Current User’), Region (enter a number 1 through 10), State, County, or Community.
The results of the Find operation will be returned in the dropdown list at the bottom of the dialog. Select one job or all of them. You will be returned to the JTX interface and will see the list of the job(s) that you select from the dropdown.
|
User selects search criteria
A complete or partial string can be added
Dropdown menu provides list of all job IDs |
 |
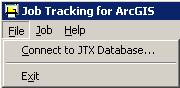
Connect to JTX Database: Allows user to set up different server configurations to allow work on a different geodatabase. This option shouldn’t be used since all FEMA work will be done on one server.
Note: All functions on this menu work the same as those previously defined in the JTX Toolbar Section of this user guide.
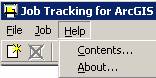
Contents: opens the standard JTX help as created by ESRI. At this time it does not reflect any of the customizations made by the National Service Provider.
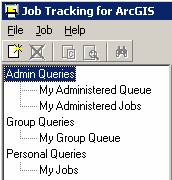 |
Within the Job Query window there are three different sets of queries that you can run including Admin Queries, Group Queries, and Personal Queries. |
This set of queries allows an administrator to see what jobs are queued for the group that they are in charge of (My Administered Queue) and what jobs have been assigned to particular people within their group (My Administered Jobs).
This query shows all jobs that are assigned to the group to which you belong.
This query shows all jobs that are assigned to you.
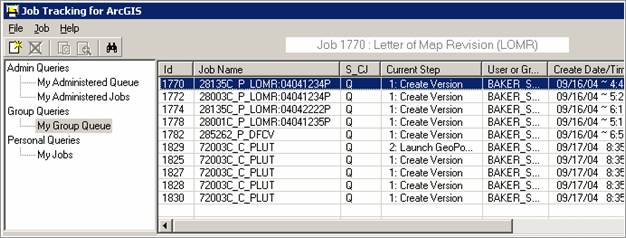
Regardless of which query section you choose to view, the same job information will be displayed as seen in the above image. Note that jobs can be sorted in ascending or descending order by clicking on a column header.
ID = the unique ID for that job
Job Name = name of the job, which tells the county/community, whether it is a parent job or a child job, what type of job it is, and job case number (for LOMR only)
Sample Job Name: 28135C_P_LOMR:04041234P
28135C is the community number
P means that it is a parent job
LOMR identifies the job type (other job types are STDY- DFIRM Study, DFCV − DFIRM Conversion)
:04041234P is the case number (LOMR only)
For Child Jobs, LOMR will change to reflect the current step of the child job (PLUT for Populating Look-Up Tables and COMP for Compilation tasks)
S_CJ = identifies whether a job is assigned to a specific person (Q = queued, A = assigned) and if any child jobs exist (child jobs will show up as A_2 where the number indicates how many child jobs have been created)
Current Step = identifies current step to be completed
User or Group = identifies who the job is assigned to
Create Date/Time = displays the date/time that the job was initiated
Description = describes the job by area and type (E.g. Arapahoe County in Colorado: DFIRM Study)
This section is used to assign jobs, show the job steps, show the job history, and add comments or notes to the current job selected in your queries window.
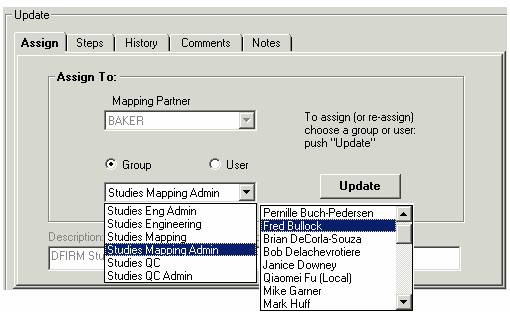
This tab allows you to assign a job to another user, group or mapping partner, depending on your privileges.
When the user selects the category of who they want to assign the job to (mapping partner, group, or user), dropdown lists are provided for the user to choose from, as seen in the image below.
Once the appropriate party has been identified, the Update button is used to apply the selection to the job.
When a new parent or child job is assigned to a user, a version of the data will be created. Assigning the job from one user to another will not result in the creation of a new version.
|
| Groups and Users are sorted by Mapping Partner |
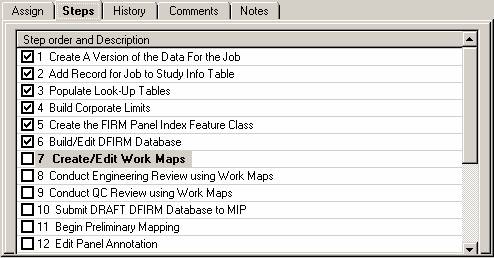
This tab shows users a list of all the required steps of their job, and identifies which steps have been completed, which step is the current step, and which steps need to be completed.
|
Check marks are used to identify completed steps.
Highlight identifies current step.
All other steps after current step need to be completed. |
|
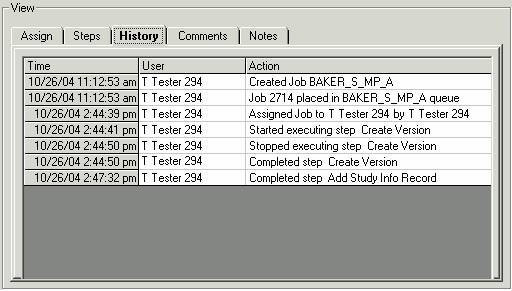
This tab displays all user interaction with a job as seen in the image below. Each time a user interacts with a job, a time stamp, user name, and action description is automatically recorded in the JTX admin database.
This tab allows the user to add any additional time sensitive information that is not captured automatically and shown in the History tab. This supplemental information is maintained by JTX for the duration of the job. The user must type their comment into the comment box and press the Add button for the comment to be recorded.

This tab can be used to add general comments to the project that are not time sensitive. After the comment is entered, click on Update to commit the entry to the field.
This tab is used to work on the current step of a job, or to advance a job to the next step. Within the tab, the name of the project, current step of the project, warnings, and the status of the job (step and child job information) are shown as seen below. Clicking on the Work Action >> button will open the menu seen below on the right.
|
Describes what will happen when the current step is run. Prompts user to run a step or perform another action. Indicates when a step can be run or what needs to be done in order to run the step. |
|
Work Action Menu options: 
|
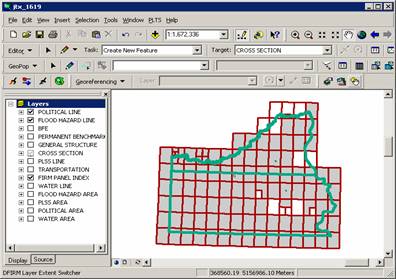
Allows the user to work on the current step of the job. If the step is not procedural, an ArcMap session will be launched automatically and customized based on the requirements of the step. The ArcMap project will include the default DFIRM layers and any toolbars that will be needed to complete the step.
Allows the user to identify when a step is complete. Some steps will launch an ArcMap session for the user depending on the requirements of the task. When a user exits ArcMap the job is not automatically marked as complete since the user may need to continue work at a later date. For these steps, the user will need to use the Mark Current Step Done function to identify that the step is complete.
This allows the user to return to the previous step in the workflow. This may be necessary if a member of the engineering department identifies a problem that a member of the mapping department must go back and correct.
When the job is complete, this allows the user to close the job.
|
Note: All functions on this menu work the same as those previously defined in the Updates and Views Section of this user guide. |
Outlined below are additional toolbars that will be added to ArcMap at given steps of a job.
![]()
This toolbar is used to render feature classes with predefined symbols. This toolbar also acts as a quality control tool as it can identify errors in the attribution of feature classes.
Renders all features using symbology based on the Valid Value Tables (VVTs). If the VVTs identify a feature as an error (doesn’t pass valid value checks), it is symbolized differently than the valid features.
This tool renders line feature classes to show dangle, pseudo, and regular nodes.
This renders all the layers using the default unique value renderer with random symbols.
Allows users to set transparency on polygon features.
The tools on the Load Additional Data Toolbar allow users to add data to their ArcMap session that is not added automatically as part of the standard DFIRM layers. Data that a user may wish to add includes raster catalogs of DOQs/Quads, contour lines, effective panel layout schemes, and any of the enhanced SDE feature classes.
|
|
DFIRM Layer Data Loader | Adds additional layers and tables from the SDE geodatabase |
|
|
DFIRM Reference Data Loader | Adds reference data to the map view |
|
|
Show DFIRM Adjacent Area | View adjacent DFIRMs |
|
|
Show Only DFIRM Area | Remove view of adjacent DFIRMs |
|
Available Data Layers: list of any features that are part of the SDE geodatabase that can be added
Select features form the Available Data Layers box and hit the add arrow to add it to the list of features to be added to ArcMap |
|
To-be-loaded data layers: list of all features that will be added to ArcMap
Will add all standard layers to ArcMap (done by default) |
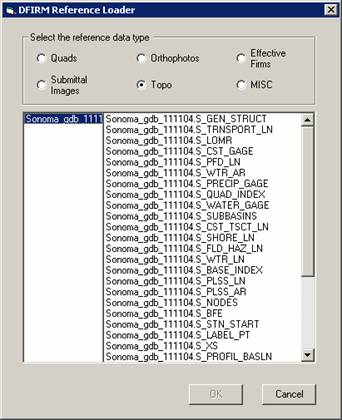
Used to add any additional reference data that does not reside in the SDE geodatabase. This includes: raster catalogs (DOQs or USGS Quads), topo (contour lines), and effective map layouts.
|
Select type of reference data to load
Any files of the selected type will be displayed in this box for the user to select from
Adds selected data to ArcMap session |
|
If the user selects the “Topo” or “MISC” radio button, then they will receive the following message:
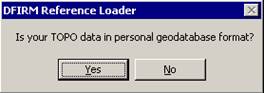
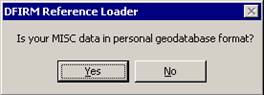
If the user selects “Yes”, then the dialog changes to the following, where the user can pick the personal geodatabase and then will be able to choose the feature classes from that geodatabase:
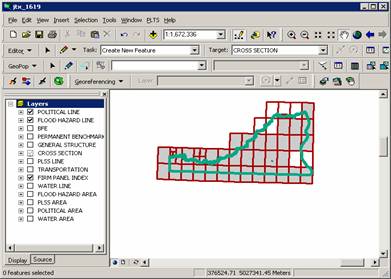
Click on this button to show data for adjacent areas. If data for adjacent areas is loaded into the database, it will be shown. You will not have permission to edit any data in an adjacent area; it is only shown for your reference. Once you select the button, its icon will change to that of the Show Only DFIRM Area tool.
Click on this button to remove data showing for adjacent areas. Once you select the button, adjacent data will disappear and the button icon will change to that of the Show DFIRM Adjacent Area tool (see above).
Problem: I see the following error message when I try to uncheck the previous step.
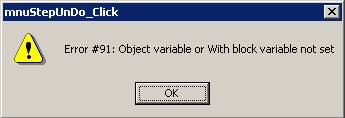
Solution: Users cannot uncheck a step at which a version is created. If you are working in a child job and want to go back to the previous parent step, you must mark all of the steps in the child job complete and close the child job. Once you are back in a parent job, you can uncheck the previous step(s) until you are at the step you need to be.
If you need assistance with this tool, please contact the representative at your local RMC.
| NAME | ROLE | PHONE | |
|---|---|---|---|
| REGION I | |||
| Brent McCarthy | Lead | Brent.McCarthy@mapmodteam.com | (336) 240-7339 |
| Jeffrey Burm | GIS/Mapping | JeffBurm@mapmodteam.com | (517) 482-4930 x4752 |
| REGION II | |||
| Rich Cassin | Operations Manager | Rich.Cassin@mapmodteam.com | (914) 333-5366 |
| Michael Crino | GIS/Mapping | mcrino@mbakercorp.com | (718) 482-9945 |
| REGION III | |||
| Mike Conaboy | Operations Manager | mconaboy@mbakercorp.com | (609) 734-7922 |
| Lee Brancheau | Senior GIS Manager | lbrancheau@mbakercorp.com | (609) 734-7912 |
| REGION IV | |||
| Stephen King | Operations Manager | Stephen.King@mapmodteam.com | (678) 459-1010 |
| Kagan Kuyu | GIS/Mapping | Kagan.Kuyu@mapmodteam.com | (678) 459-1041 |
| REGION V | |||
| Sujata Banerjee | Business Manager | Sujata.Banerjee@mapmodteam.com | (312) 575-3902 |
| Pam Coye | GIS/Mapping | Pam.Coye@mapmodteam.com | (312) 575-3913 |
| REGION VI | |||
| Dan Hoecker | Operations Manager | Dan.Hoecker@mapmodteam.com | (940) 783-4155 |
| Phil Nguyen | GIS/Mapping | pxnguyen@mbakercorp.com | (940) 783-4121 |
| REGION VII | |||
| Matthew Koch | Operations Manager | mkoch@watershedconcepts.com | (816) 502-9420 x4952 |
| Rod Odom | GIS/Mapping | rodom@watershedconcepts.com | (816) 502-9420 x4957 |
| REGION VIII | |||
| David Jula | Operations Manager | David.Jula@mapmodteam.com | (720) 514-1100 |
| Mike Garner | GIS/Mapping | Mike.Garner@mapmodteam.com | (720) 514-1105 |
| REGION IX | |||
| Travis Clark | Business Manager | Travis.Clark@mapmodteam.com | (510) 879-0950 |
| Michael Skowronek | GIS/Mapping | Michael.Skowronek@mapmodteam.com | (510) 879-0958 |
| REGION X | |||
| Michael Morgan | Business Manager | Mike.Morgan@mapmodteam.com | (206) 344-3891 |
| Timothy Witten | GIS/Mapping | wittentd@bv.com | (206) 344-3891 |