
Data ReViewer
User Guide
FEMA DFIRM Production Tools
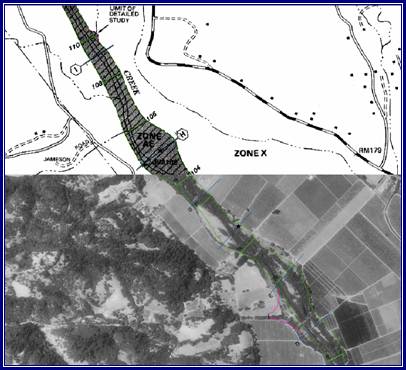
Table of Contents:
What is Data ReViewer?Data ReViewer Overview
Data ReViewer Key Concepts
Data Reviewer Session
Data ReViewer Error Table
Notepad Feature Classes
Batch Validate Log File
What can you do with Data ReViewer?
Quick Reference Guide
Editing in the JTX Environment
Tool Controls
Data ReViewer Toolbar Tools
Data ReViewer Extension Toolbar
Error Table Tools
Visual QC Methods
Add a new feature
Delete a feature
Edit or reshape a feature
Move a feature
Make a fence move
Flag to check tie-ins
Add attribute information
Edit an attribute
Edit many attributes
Verify error correction
Trouble – Shooting
Contacts
Appendix A – Batch Validation Check Summaries
Overview
Checks tied to the FIRM Panel Index (S_FIRM_PAN)
Complex Condition Table Checks
Valid Value Checks
Condition Table Error Checks
Checks Tied to Other Feature Classes
What is Data ReViewer?
Data ReViewer is a component of ESRI’s Production Line Tool Set (PLTS) system that allows you to perform two important quality control (QC) functions in the course of DFIRM production: batch validation of spatial and attribute data and visual review of work maps and check-prints.
Use Data ReViewer to verify spatial data and attribute data in a batch validation process. The custom checks that have been written will help to ensure that the data complies with the April 2003 Guidelines and Specifications for Flood Hazard Mapping Partners Appendix L: Guidance for Preparing Draft Digital Data and DFIRM Databases (hereby referred to as Appendix L).
Data ReViewer is also used to visually review work maps and check-prints for errors in a digital environment. Errors are identified based on information in study engineering tables as well as the comparison of the DFIRM data with raster images such as orthophotos, scanned effective maps, and scanned contractor work maps. You can log errors identified, add error correction information, and note whether corrections made are acceptable or not. The identified errors and their correction history are associated with the project, so the user(s) to whom the project is assigned can access them. Common errors that can be noted with Data ReViewer tools include: add a feature, delete a feature, edit or reshape a feature, move a feature, make a fence move, and edit or add an attribute.
To accomplish the QC tasks described above, Data ReViewer has two toolbars. An additional set of tools is available in the error table and is accessible after you have opened a ReViewer session.
| Data ReViewer Toolbar |

|
| Tools most frequently used in DFIRM production |
| Data ReViewer Extension Toolbar |
|
|
| Error Table Tools |

|
Data ReViewer Overview
The key sections of this guide are:
- Key concepts and definitions
- Quick user reference guide
- Descriptions of tools and how to use them
- Support/contact information
Data ReViewer Key Concepts
Data Reviewer Session
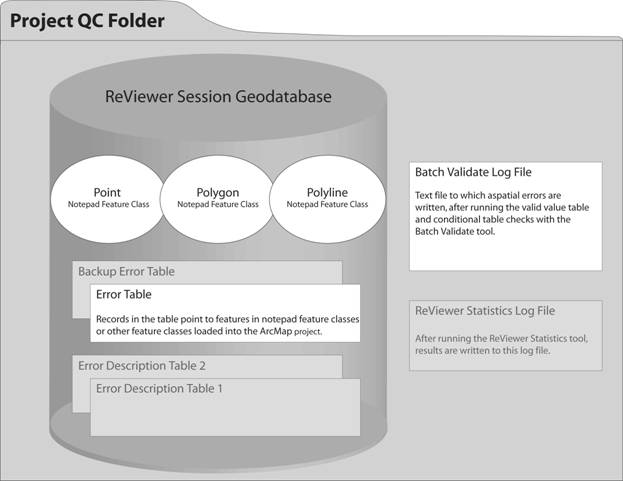
A Data ReViewer session is more than just an instance of working in Data ReViewer. A session is a geodatabase that holds four flat files and any feature classes that are generated through the use of the Polygon, Polyline, or Point Notepad tools. It is not possible to connect to more than one ReViewer session at a time.
The contents of a ReViewer session and the project QC folder are shown in the graphic below. The most important components to note are the error table, the notepad feature classes, and the batch validate log file.
|
| Contents of the Project QC folder and a Data ReViewer session geodatabase |
Data ReViewer Error Table
The Data ReViewer error table is one of the flat files stored in the ReViewer session geodatabase. It is the repository for all errors identified during visual quality control as well as errors identified through batch validation that are related to spatial (or S_) tables. The error table does not contain any shapes, only references to spatial features belonging to feature classes in the ArcMap project.
The ReViewer session geodatabase also holds a back-up error table, which has a record for every error entered into the error table, even those that are subsequently deleted. You can copy a record from the back-up table if you inadvertently delete it from the error table.
It is possible to have more than one error table within a session geodatabase. Each error table will have its own corresponding back-up error table.
The table below contains a description of fields found in the error table. The back-up error table contains the same fields, plus one that indicates whether a record has been deleted from the main table or is a copy of another record.
| Field Name | Description |
| ErrNum | A unique record ID number |
| FeatureID | Number of the feature from the feature class attribute table |
| X_DD | X-coordinate in decimal degrees |
| Y_DD | Y-coordinate in decimal degrees |
| X_DMS | X-coordinate in degrees, minutes, seconds |
| Y_DMS | Y-coordinate in degrees, minutes, seconds |
| X | X-coordinate in meters |
| Y | Y-coordinates in meters |
| Location | File location of feature class referenced by error record |
| FeatureClass | Name of the feature class referenced by error record |
| F_Code | Feature code (user-defined) |
| Check | Error entry created by User Review or BV_GEN (Batch Validate) |
| Rev_status | Error description |
| Rev_tech | User name of individual who committed error to table |
| Rev_date | Date error was committed to table |
| Cor_status | Error correction status |
| Cor_tech | User name of individual who entered error correction status |
| Cor_date | Date on which correction status was entered |
| Ver_status | Verification of error correction status |
| Ver_tech | User name of individual who entered the error verification status |
| Ver_date | Date on which verification status was entered |
| VPF | Vector Product Format – Not applicable, will always show a null value |
Notepad Feature Classes
You can create more than one error table in a ReViewer session. However, it is not possible to create more than one instance of a notepad feature class type. For instance, you cannot have two polygon notepad feature classes within a single ReViewer session.
Batch Validate Log File
This text file contains basic information about errors detected by running the customized batch validate checks using the Batch Validate tool. Errors in spatial and lookup tables are written to the log file. For each feature class with errors, the log file will show the name of the table or feature class, the name of the field with the error, the object ID of the feature containing the error, and a warning or error message. The log file is overwritten each time you run the Batch Validate tool.
What can you do with Data ReViewer?
| Use the Show Error Tablebutton to view the error table and to access additional tools. |
|
Use the Batch Validate tool to run customized checks to ensure that data meets FEMA’s Appendix L specifications. |
|
|
| Add a selected feature to the error table with the Commit Error tool. |
|
Use the Select and Identify Featuretool to simultaneously select features and view their attributes. |
|
|
| Speed error logging with the Duplicate Error button. |
|
Sketch features or circumscribe areas for editing with the Polygon Notepad tool. |
|
|
| The Correct Errors button changes the error table display and allows you to update each error record based on the edits you make. |
|
Use the Polyline Notepad tool to show how a line should be reshaped or to sketch a missing feature. |
|
|
| Review edits made and use the Verify Correction tool to label edits as acceptable or not. |
|
Indicate locations of point features to be added or use the Point Notepad tool to help describe corrections to be made. |
|
Quick Reference Guide
The following is a quick reference guide to the tools available in Data Reviewer.
| Data ReViewer Toolbar |
|
|
| Tools most frequently used in DFIRM production |
|
|
Start ReViewer | Start a new or existing ReViewer session. |
|
|
Show Error Table | Display the current table in the ReViewer table browser. |
|
|
Change User Name | Change your default user name (Windows NT login). |
|
|
Change Error Table | Within a ReViewer session, switch to a different error table. |
|
|
Import Error Table | Import an error table from a different ReViewer session. |
|
|
Calculate Working Extent | Specify the extent of the area you are reviewing. |
|
|
Select and Identify Feature | Select a feature and view its attributes. |
|
|
Flag Missing Feature | Place a marker at a location where a feature is missing and log the marker to the error table. |
|
|
Commit Error | Log a selected feature to the error table. |
|
|
Duplicate Error | Duplicate the previously logged error at a new point location. |
|
|
Batch Validate | Validate the current selection or extent, based on custom DFIRM production rules. |
|
|
Minimum Area | Check for polygons smaller than a minimum size set by the user. |
|
|
Duplicate Point | Check a feature class for duplicate points within a user-specified distance of one another. |
|
|
Point On Poly | Check for points within polygons in an area feature class. |
|
|
Poly On Poly | Check for overlapping polygons in two feature classes. |
|
|
Review Selection | Navigate the selected features and log errors to the error table. |
|
|
Select Named Features | Select features based on attribute values. |
|
|
Feature Count | Show the number of features in each layer in the ArcMap project. |
|
|
Zoom to XY | Zoom the display to a set of coordinates (use meters). |
|
|
ReViewer Statistics | This feature has been disabled. |
|
|
Validate Simple Geometry | Check the topology of editable feature classes according to feature class type. Must be in edit mode. |
|
|
Sampling | Create a sample of features to review from single or multiple feature classes. |
|
|
Frequency | Calculate the number of features in a selected feature class, for each value of an attribute. |
| Data ReViewer Extension Toolbar |
|
|
|
|
Open Error Log | Retrieve the Batch Validate Log File. |
|
|
Load Notepad Feature Class | Add a Notepad Feature Class back into the ArcMap project, if it has been removed. |
| Error Table Tools |
|
|
To access these tools, click on the Show Error Table button
![]() in the Data ReViewer Toolbar.
in the Data ReViewer Toolbar.
|
|
Visit Error | Zoom to the location of the selected error record. |
|
|
Sort Error Table | Select the error table column by which entries should be sorted. |
|
|
Generate Error Feature Class | Create a feature class with each record in the error table representing a feature. |
|
|
Verify Correction | Classify an error correction edit as acceptable or not. |
|
|
Delete Record | Delete the selected error table record. |
|
|
Edit Table ON/OFF | Change the error table status from editable to not editable. |
|
|
Toggle Column Visibility | Select error table columns to be displayed or hidden. |
|
|
Polygon Notepad | Sketch area features. |
|
|
Polyline Notepad | Sketch line features. |
|
|
Point Notepad | Sketch point features. |
|
|
Correct Errors | Add information to an error record regarding corrections made. |
|
|
Map Units | View or change map units used in the display. |
Editing in the JTX Environment
If you start making edits to the data, based on errors identified using the tools available in Data ReViewer, you may see the dialog below when you start an editing session.
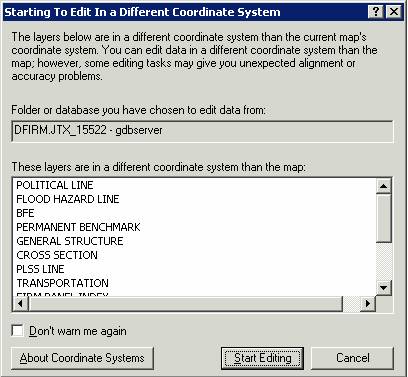
The dialog box warns you that the version of the data that you are planning to edit is stored in a different projection than that which it is displayed in the ArcMap project. The ArcMap session in which you are working projects the data based on the entry made in the STUDY_INFO table and the data is stored in geographic. Click on Start Editing to accept the warning. You can also opt to not be warned again.
Tool Controls
This section describes the functionality of each of the tools available in Data ReViewer. For more information see:
Data
ReViewer Toolbar Tools
|
|
| Tools most frequently used in DFIRM production |
 Start ReViewer
Create a new ReViewer session or open an existing one. For an explanation of a Data ReViewer session, see the Key Concepts section of this user guide.
It is suggested that you create a ReViewer session for each round of QC you perform for a project. This way, errors identified by Engineering and QC staff are in one location. You can use any naming convention that you choose for sessions and error tables.
One option for visual QC is to name sessions according to the QC round, or review of the entire dataset. For batch validation, one ReViewer session with a single error table will probably be sufficient. You may find it useful to have a new error table for each round of batch validation you perform. Keep in mind that errors in spatial (S_) tables are written to both the log file and the error table. Errors in lookup tables (L_) are only written to the error log file.
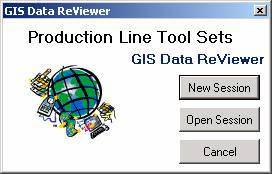
- Click on the Start ReViewer button to
initiate a new session or open an existing session. Select your project number in the dialog box
that appears.
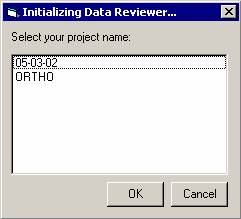
Project selection window - Select
the project name and click OK and you
will be prompted to open an existing session or to create a new one. Make a selection.
Start a new ReViewer session or open an existing one - Your Citrix user name will be entered in the form for you. Enter information in the Session Name and
ReViewer Table Name fields.
- If this is a new ReViewer session, enter a name for it. Enter a name for the error table in the ReViewer session.
- If you are opening an existing session, select the session geodatabase from your project’s QC folder. Select the error table from those listed in the ReViewer Table Name dropdown list or type in a new name to create a new error table.
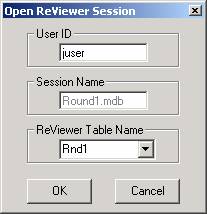
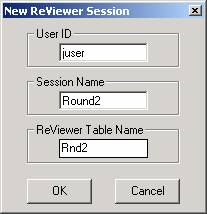
Opening an existing session Creating a new session
 Show Error Table
- Once you have opened or created a ReViewer session, view the error table by clicking on the Show Error Table button.
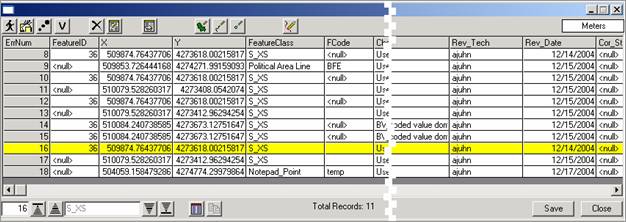
- The error table will appear at the bottom of the ArcMap project window. If this is a new session, the table will be
empty.
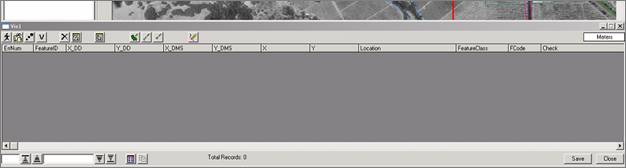
Error table showing in ArcMap project window
 Change User Name
Change your default user name, which will be your Citrix username.
 Change Error
Table
Change Error
Table
Switch to a different error table within a ReViewer session.
 Import Error
Table
Import Error
Table
Import an error table from a different ReViewer session in your project folder.
 Calculate Working Extent
Specify the extent of the area you are reviewing.
 Select and
Identify Feature
Select and
Identify Feature
During visual quality control, the Select and Identify Feature tool can simultaneously select a feature and show its attribute information.
- Determine the layers from which you want to make your selection.
- From
the Selection dropdown menu, choose Set Selectable Layers…
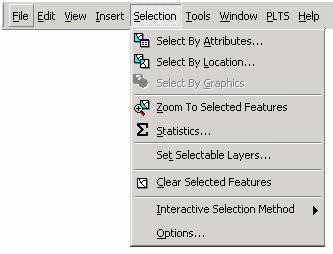
Set Selectable Layers…
- A
dialog box will appear. Click on the
check boxes next to the layers from which you want to make your
selections. You can modify which layers
are selectable at any time during a ReViewer session.
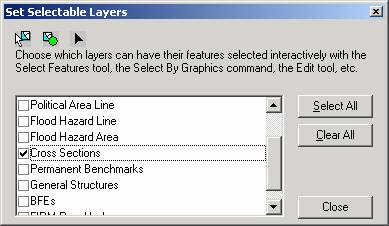
Check the boxes beside the layer(s) from which you want to make selections - When you have made your selection(s), click on the Close button.
- Click
on the Select and Identify Feature tool
and use the pointer to select your feature of interest.
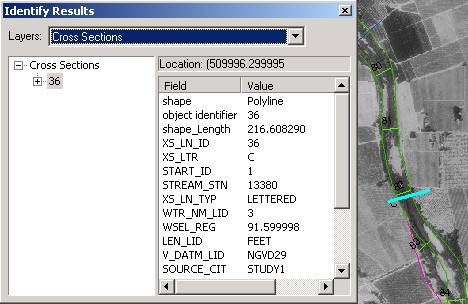
A cross section was selected and is shown highlighted in light blue. The attribute information for the cross section appears in the Identify Results window. Note: If you do not see the attribute fields for the feature you selected, pick the layer from the dropdown list at the top of the Identify Results window and re-select the feature. If there are no values in the fields, the feature has not been attributed. Use GeoPop Pro to attribute features.
- To
clear the selection
- In the Table of Contents, right click on the name of the layer from which the selection was made
- Pause the pointer over Selection to view the options under the heading
- Click
on Clear Selected Features
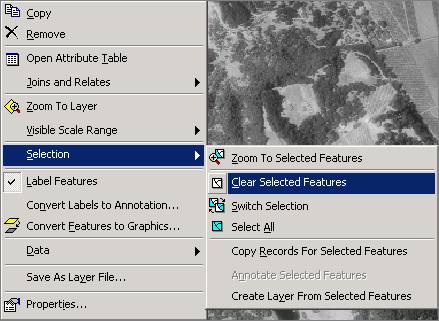
Right-click on the layer name from which a selection has been made and Clear the Selected Features
 Flag Missing
Feature
Flag Missing
Feature
Use the Flag Missing Feature tool to identify the locations of features that appear in base maps and should be digitized.
Note: This tool should only be used in those instances in which there will be no ambiguity regarding the feature to be digitized. A more conservative approach would be to use the Notepad Polyline or Polygon tool and provide a sketch for the analyst to reference along with the error description.
- Zoom to the area of interest on the map.
- In the Table of Contents, click on the layer to which the missing feature should be added. The layer name will be highlighted.
- Select the Flag Missing Feature tool. The cursor will change from a simple pointer to a hollow pointer with a flag appended to it.
- Click on
the feature that should be digitized. In
the example shown, a Base Flood Elevation (BFE) was not digitized and needs to
be added to the BFE layer.
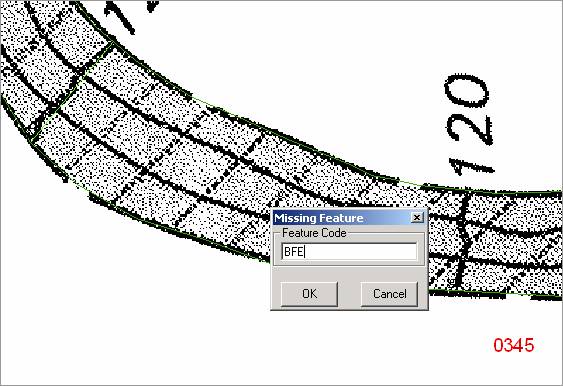
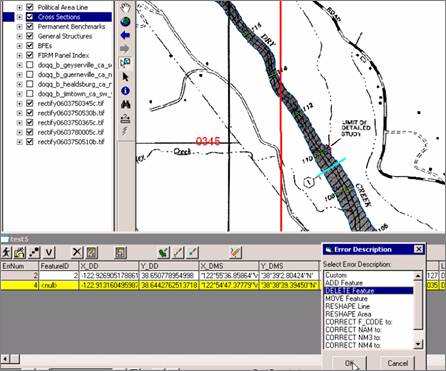
Feature identified as missing (BFE labeled 120 on scanned effective map) with the Missing Feature code dialog box - Type in a short string of text to denote the feature. Click OK.
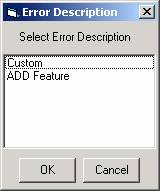
- An error
description dialog box will appear. Select one of the options. If you
choose to make a Custom entry, you can enter up to 255 characters.
Error description dialog for the Flag Missing Feature tool - Right-click on the error record and select Visit Error.
- The display will zoom to the location on which
you clicked to indicate that a feature is missing.
Note: It is good practice, when using the Flag Missing Features tool, to provide a custom description with sufficient information so that those who are making edits and reviewing corrections can understand exactly what should be done.
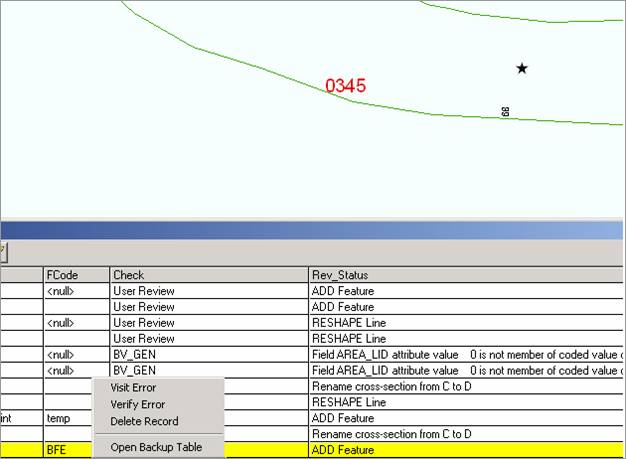
Visit the error logged in the error table using the Flag Missing Feature tool.
 Commit Error
The Commit Error tool will enter a record in the error table for a feature that has been selected. Though it is possible to select many features at once, you can only commit one error to the table at a time.
- Set the layer selection using the Set Selectable Layers… options, as described in the Select and Identify Features section.
- Use the Select and Identify Feature or Select Features tool to select a feature.
- Once the feature is selected, click on the Commit Error button.
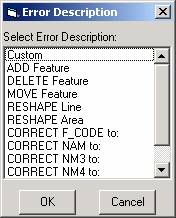
- A
dialog box will appear with error description options. Choose from the pre-defined options or select
Custom to enter a different error description.
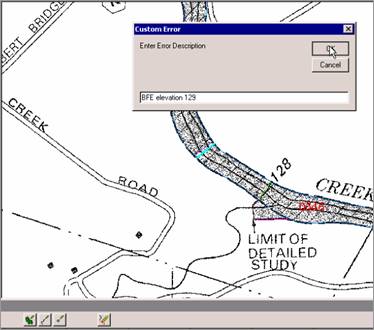
Error Description dialog box for the Commit Error tool - Enter
a custom error description of up to 255 characters (including spaces) and click
OK to commit the error to the table.
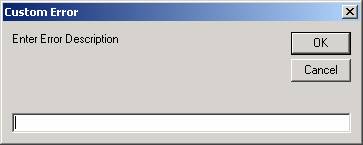
Dialog box for custom error description. Enter up to 255 characters. Note: Once an error is committed to the table, the record cannot be edited. If you enter incorrect information into the error description or decide that the description does not include sufficient detail, you must delete the record and create a new one.
 Duplicate Error
This button can speed error entry by duplicating the error most recently logged at a new location. Shapes created with the Polyline and Polygon Notepad tools cannot be duplicated. Note that the same error description will appear in the duplicate record because the error table is not editable.
- Select the Duplicate Error button.
- Click on the new location at which the previously logged error would apply.
- The error table will be updated with the new error record.
- You can continue to log new, duplicate errors by clicking on new locations.
 Batch Validate
Run custom checks using this tool to ensure attribute and look-up table values are valid and meet FEMA’s Appendix L standards as well as to ensure that certain conditions are met for spatial data. Appendix A includes descriptions of each check that is run.
There are four types of checks that can be performed using the Batch Validate tool (Geodatabase validation, Valid Value Table validation, Relationship Check of Entire FCs, and Condition Table validation). Of these, the condition table validation is the focus.
- Geodatabase validation will check for invalid fields, attribute and spatial relationship rules, domains, and stand-alone object tables. Using GeoPop to populate lookup tables and create features will prevent these types of errors.
- Valid Value Table validation will check the selected feature class attributes against the valid value tables (VVTs), which are derived from the domain values of the fields. The PLTS Renderer will use purple to symbolize incorrectly attributed features. If the errors are detected in Batch Validation, records will be entered in the batch validate log file.
- Relationship Check of Entire FCs (feature classes) will check one to one and one to many relationships in your feature class. Orphans and missing keys are flagged.
- Condition Table validation is accomplished through custom extensions that perform the necessary attribute and spatial checks on DFIRM databases. These condition table (CNT) checks consist of the execution of queries on spatial and lookup tables to ensure that values entered are valid and are logical, given the entries in other fields. Additional checks analyze spatial feature classes for errors.
All detected errors are written to the batch validate log file. This file is overwritten each time Batch Validate is run. Errors associated with feature classes (S_) are also written to the error table, so the analyst can zoom to the location of the error and make corrections efficiently. Each time Batch Validate is run, you can choose to write detected errors associated to the error table. These records will be added to the table, even if the same error has already been logged.
Note: If you have created any Notepad Feature Classes, remove them before running Batch Validate.
- Open a ReViewer session (see Start ReViewer).
- Zoom to the spatial extent of the FIRM Panel Index by right-clicking on the layer name and selecting the option to Zoom to Layer.
- Add additional feature classes that require validation to the ArcMap project by using the DFIRM Layer Data Loader tool.
- Set
the selectable layers by clicking on the Selection
dropdown list and clicking on Set Selectable
Layers. Batch Validate will only validate the features
that are in the selectable layers.
Note: It is recommended that for the initial batch validation, you run the checks one feature class at a time. Control the feature classes being validated with the Set Selectable Layers options. To reduce time spent waiting for redraws, you can make a selection manually (using the Select Features tool) and then turn off the layer(s). Those layers with selected features will be detected when you launch Batch Validate.
- Select
the Batch Validate tool. The following warning message will appear.
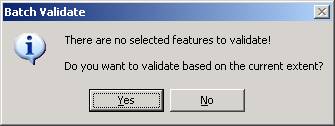
Run the batch validation checks on the current extent - Click Yes, to Batch Validate the current view extent.
- The
Batch Validate dialog box will
appear. You will see the names of the
feature classes that will be validated in the window on the left. Click on the checkmark next to the feature
class name to select / deselect feature classes.
Batch Validate dialog window - Select the Condition Tables box. Click on a feature class name on the left and you will see the checks that will be run against it. Click on the checkmark next to the check name to select / deselect it.
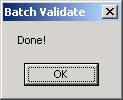
- Click
on Validate. When the validation of the feature classes is
complete, you will be notified.
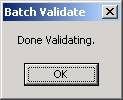
Click on OK to accept message - Accept the notification by clicking on OK. At this point, all detected errors will have been written to the batch validate log file.
- You
will be asked if you want to write errors to the error table. This operation will write the errors
associated with feature classes (S_) to the error table. Make your selection.
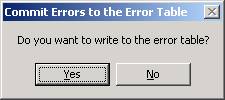
Write the errors identified to the error table - If
you decided to write the errors to the error table, you will be notified when
the operation is complete. Click on OK to accept the message.
Click on OK to accept message - You
can open the batch validate log file by clicking on the Open Log button. You can retrieve the log file after you close
out of the Batch Validate dialog
using the Open Error
Log tool (p. 25). The
next time you run batch validate for this project, this log file will be
overwritten.
Batch Validate dialog window - To review errors associated with feature classes (S_), open the ReViewer error table. You can double-click on an error to select it and zoom to its location.
- For
errors detected in lookup tables (L_), load the lookup table into the ArcMap
project, using the DFIRM Data Layer Loader
tool. Switch to the Source tab (below
the Table of Contents) to view the loaded table(s).
Note: Some of the batch validation checks will evaluate fields that are only populated if you are creating an enhanced database. If you are creating a standard database, ignore the error messages preceded by “[Enhanced].”
- Repeat batch validation after making edits to the tables or features.
- If you want to validate the same set of features – click on Batch Validate and choose the checks you want to run on the selection.
- If you want to run Batch Validate on additional features or a new set of features, you must clear the existing selections or manually add features to the selection set. Once you have made your selections or de-selected the previous selections, click on Batch Validate and choose the checks you want to run.
 Minimum Area
Check for polygons smaller than a minimum size set by the user.
 Duplicate Point
Check a feature class for duplicate points within a user-specified distance of one another.
 Point On Poly
Check for points within polygons in an area feature class.
 Poly On Poly
Check for overlapping polygons in two feature classes.
 Review Selection
Navigate the selected features and log errors to the error table.
 Select Named
Features
Select Named
Features
Select a set of features based on attribute values.
 Feature Count
Show the number of features in each layer in the ArcMap project.
 Zoom to XY
Zoom the display to a set of coordinates (use meters).
 ReViewer
Statistics
ReViewer
Statistics
This feature has been disabled.
 Validate Simple
Geometry
Validate Simple
Geometry
Check the topology of editable feature classes according to feature class type. You must be in an edit session to use this tool.
Note: To ensure that your dataset meets the topology rules for DFIRM databases, load the topology rules using the DFIRM Layer Data Loader and validate feature classes based on a selection or view extent. Add the Topology Toolbar to access the Validate Topology in Current Extent tool.
 Sampling
Create a sample of features to review from single or multiple feature classes.
 Frequency
Calculate the number of features in a selected feature class for each value of an attribute.
Data ReViewer Extension Toolbar
| Data ReViewer Extension Toolbar |
|
|
 Open Error Log
Once you have run Batch Validate, you can open the log file immediately and save it to your local workspace. If you exit out of the Batch Validate dialog, you can retrieve the most current log file by using the Open Error Log tool.
Note: Each time you run Batch Validate, the Batch Validate log file is overwritten.
- Click
on the Open Error Log tool. The following dialog box will appear:
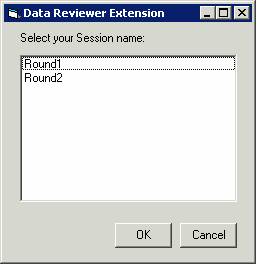
Select the ReViewer Session in which you are working. - Select the name of the session you were in when you ran Batch Validate and click OK.
- The
Batch Validate Log file will open.
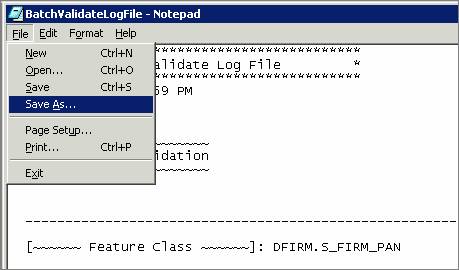
Preparing to save the Batch Validate Log File to a local drive - Select File and Save As to save the file to your local drive.
 Load Notepad
Feature Class
Load Notepad
Feature Class
When you create a notepad feature class using the Polygon, Polyline, or Point Notepad tool, it is automatically added to your ArcMap project table of contents. If you remove a notepad feature class, use this tool to re-add it to the project.
- Open a ReViewer session (see Start ReViewer).
- Click
on the Load Notepad Feature Class
tool. The following dialog box will
appear:
Select the ReViewer Session in which you are working. - From the list, select the name of the Session that you are in.
- All feature classes with features will be added into the ArcMap project table of contents. This may result in duplicate notepad feature classes being shown in the project. Remove duplicates by right-clicking on the layer name and selecting Remove from the options.
- If
no features exist in any of the feature classes, the following error will be
returned.
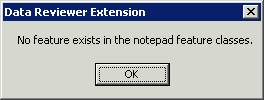
Error message displayed if Notepad Feature Classes are empty
Error
Table Tools
Click on the Show Error Table
button ![]() located on the Data ReViewer Toolbar to open the error table and to access these additional tools.
located on the Data ReViewer Toolbar to open the error table and to access these additional tools.
| Error Table Tools |
|
|
 Visit Error
To zoom the map display to the location of an error record in the error table, click on the Visit Error button. You can also right-click on the record and select Visit Error from the list of options.
- Select a record in the error table by clicking on a row.
- Click on the Visit Error button to zoom the map display to the location of the logged error.
- If
you get the following error message, see the Trouble-Shooting
section.
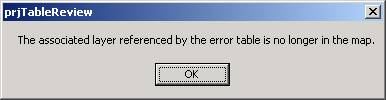
Error message displayed if you visit an error in the error table that references a layer that does not appear in the table of contents.
 Sort Error Table
Sort the records in the error table.
- Click on the Sort Error Table button
- From
the dialog box, choose a field or column on which to sort the table. You can sort on any field in the table, even
those that you have hidden from display. For a description of each field in the error table, see Data ReViewer Error Table
in the Key Concepts section.
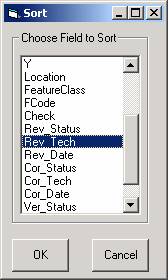
Sort the error table by a field selected from the dialog box. - Records will be sorted in ascending order according to the entries in the field you select.
 Generate Error
Feature Class
Generate Error
Feature Class
Generating an error feature class from the records in the error table can speed edit correction and correction review processes. You can symbolize the errors in a way that stands out to you and view the geographic distribution of errors. All records in the error table will become point features in the Error Feature Class.
- Click on the Generate Error Feature Class button.
- Enter
a logical name for the feature class and click OK.
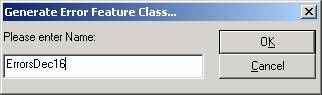
Enter a name for the error feature class you are creating. Do not include any spaces or special characters (e.g. -, /, *) in the name. - The feature class is added to the ArcMap project and is saved in the ReViewer session geodatabase with which you are working.
 Verify
Correction
Verify
Correction
Once edits have been made to the data use the Verify Correction tool to classify corrections as acceptable or not.
- Select an error record and zoom to its location by right clicking on the record row and selecting Visit Error, or by clicking on the Visit Error tool located in the error table.
- Review the correction made.
- Click
on the Verify Correction tool and
choose a status from the options or add your own (up to 255 characters) with
the Custom option. If you choose
“Unacceptable,” you will be prompted to provide an explanation.

Choose a status for an error correction. - The
record in the error table will be updated with your user name, the date on
which you entered the verification status, and the status that you selected.
Note: You cannot edit the error table after making an entry. If you make an error, see the Trouble-Shooting section.
 Delete Record
Any user can delete records from the error table at any time, in a ReViewer session. Since the records do not hold spatial data, only references to features in feature classes, no features will be deleted if the corresponding record in the error table is deleted. This is true even of features that were created using a Notepad feature tool.
For each error table in a ReViewer session, a back-up error table is created. Access a back-up table by right-clicking anywhere on the error table and selecting the option from the list that appears. This table maintains a copy of each error committed to the error table. If you delete a record from the error table it will still be visible in the back-up table and will show a status of “deleted.” You cannot delete a record from the back-up table but you can copy one and paste it into your working error table. This is useful in the event you inadvertently delete a record.
- Select a record from the error table by clicking on it once. Selected records have a yellow highlight. You can select multiple records by holding down the shift key.
- Click on the Delete Record button.
- The selected record(s) will be deleted from the error table.
 Edit Table
ON/OFF
Edit Table
ON/OFF
During visual review of data, you can change the status of the error table to editable or not editable. Any user, with any permission level, can change the status of the table. If the Edit Table button is in the off position, you can commit errors to the table and it will automatically revert back to “editable” status. Editing the table is limited to adding errors, deleting errors, changing the columns that are visible, and adding error correction and verification information.
- Click on the Edit Table OFF button
- Tools available in the error table will be grayed-out. You will not be able to select or zoom to errors.
- Click on the Edit Table ON button to access tools and to zoom to logged errors.
 Toggle Column
Visibility
Toggle Column
Visibility
Manage your view of the error table by hiding some of the columns. See the description of the fields shown in the error table in the Data ReViewer Overview and Key Concepts sections of this guide.
Click on the Toggle Column Visibility button and click on the check boxes next to the column names to hide/unhide them.
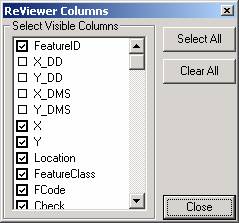 |
| Select the data columns that you would like to see in the error table. |
 Polygon Notepad
Sketch polygons around an area in which several changes need to be made or heads-up digitize a feature from an underlying raster image.
Note: In order to capture a feature correctly, you may need to locally geo-reference the raster image for the area in which you are working.
- Zoom into the area on the map in which you would like to delimit an area requiring an edit or where you want to sketch a polygon.
- Click on the Polygon Notepad tool and begin digitizing. Click on the map at each point that should have a polygon vertex.
- Double-click to end your sketch.
- A dialog will appear asking whether you would like to commit your sketch to the error table.
- If you are satisfied with it, select Yes and provide an error description from the error description dialog box.
- If you are not satisfied with your sketch, select No and re-digitize the polygon until you are satisfied with the result. The sketched polygon will remain on the map.
- Change the display symbology of the layer so that it has no fill color.
 Polyline Notepad
Sketch a line to indicate how re-shaping should be done or to add a new feature.
Note: In order to capture a feature correctly, you may need to locally geo-reference the raster image for the area in which you are working.
- Zoom into the area on the map in which you would like to add a new line feature or re-shape an existing line feature.
- Click on the Polyline Notepad tool and begin digitizing. Click on the map at each point that should have a vertex of the line.
- Double-click to end your sketch.
- A dialog will appear asking whether you would like to commit your sketch to the error table.
- If you are satisfied with it, select Yes and provide an error description from the error description dialog box.
- If you are not satisfied with your sketch, select No and re-place the point until you are satisfied with the result. The sketched line will remain on the map.
 Point Notepad
Place a point at a location where a point feature should be added or use points to describe edits that should be made to existing features.
Note: In order to capture a feature correctly, you may need to locally geo-reference the raster image for the area in which you are working.
- Zoom into the area on the map in which you would like to add a new point feature or reference information for editing.
- Click on the Point Notepad tool. Click on the location in the map at which a point should be placed. You will be able to place only one point at a time.
- A dialog will appear asking whether you would like to commit your sketch to the error table.
- If you are satisfied with it, select Yes and provide an error description from the error description dialog box.
- If you are not satisfied with your sketch, select No and re-place the point until you are satisfied with the result. The added point will remain on the map.
 Correct Errors
The Correct Errors tool puts the error table into correction mode, providing additional data entry fields to log error correction information. An analyst can track error correction progress by entering correction information into the error table as they edit the data. It is not necessary to be in an edit session to be in error correction mode.
- Click
on the Correct Errors button.
Error table before going into correction mode - The
error table display will change. The Correct Errors button, the Delete Record button, and the Edit Table ON/OFF button will disappear. A new data entry area will appear on the right
side of the table.

Error table after entering correction mode - Select one record at a time and enter error correction information.
- When you are satisfied with the entry, click on the Update button to enter the information in the error table record. If you do not click on the Update button before making another record selection, the table will not be updated and the information you entered will be lost.
- To
exit error correction mode, click on the Show Error Table button
 .
.
 Map Units
Change the Map Units at any time
during a ReViewer session. This will
change the units shown for any measurements taken using the measure tool ![]() . Changing map units
will not affect the units entered in the x- or y-coordinate columns in the
ReViewer session error table.
. Changing map units
will not affect the units entered in the x- or y-coordinate columns in the
ReViewer session error table.
- Click on the Map Units box.
- A list of options will appear.
- Click on the map units you would like to use.
- Change the units at any time during your ReViewer session.
Visual QC Methods
This section of the user guide provides guidelines for digital work map review using the Visual QC tools available in Data ReViewer. For each type of engineering or QC call typically made on a work map, an example scenario is provided and an approach is described. There are many ways to use the Data ReViewer tools to accomplish visual QC tasks.
Add a new feature
BFE was not digitized
 |
|
| Polyline notepad tool | |
- Open the error table.
- Select Polyline Notepad tool.
- Zoom in to the appropriate scale.
- Add the line to indicate the location of the BFE.
- While the feature is still selected (highlighted in blue), commit it to the error table.
- Add a custom description such as “BFE elevation 129.”
Delete a feature
Delete a cross section
 |
| Commit the selected feature to the error table |
- Set selectable layers to Cross Sections.
- Use the Select and Identify Features Tool or the Select Tool to pick feature to be deleted.
- Click on the Commit Error button.
- Select “Delete feature” from error description pick list.
- Double-click on the error in the error table or right click to visit the error.
Edit or reshape a feature
Modify a flood hazard boundary
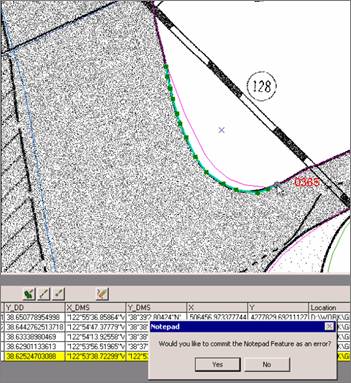 |
| After digitizing the line segment to indicate how the line should be reshaped, a dialog automatically asks if you want to commit the line segment as an error. |
- Zoom to the area of interest.
- Use the Polyline Notepad tool to digitize the reshaped line segment.
- Commit the digitized line segment to the error table.
- Select “Reshape line” from the options in the error description table.
- Visit the error.
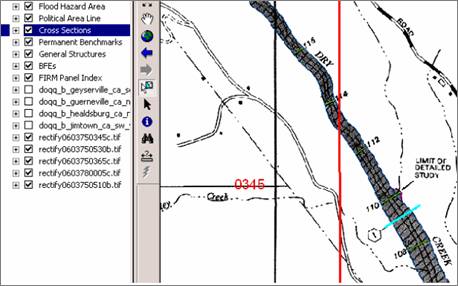
Move a feature
Align a corporate limit with a road.
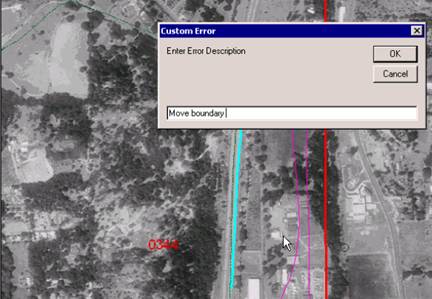 |
| The blue line (furthest to the right) indicates the location to which the corporate limit boundary should be moved. The custom error description is being entered in the dialog box. |
- Zoom to the area of interest.
- Use the Polyline Notepad tool to sketch the new location of the feature. Use the Polygon or Point Notepad tool to sketch area or point features, respectively.
- Commit the sketch to the error table.
- Add a custom description that specifies the layer that requires editing. For instance, type “New location of corporate limit boundary.”
- If there is any doubt about which feature needs to be moved to the new
location:
- Use the Select and Identify Features Tool or the Select Tool to select the feature that needs to be moved.
- Commit the selected feature to the error table.
- Select the error description “Move feature.”
Make
a fence move
 |
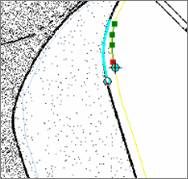
The blue line (on the left) was digitized and given a custom description to indicate that it is the “To” position of the line. The line being created with the Polyline Notepad tool (on the right) will receive a custom description to indicate that it is the “From” position of the line. |
| The Polygon Notepad tool is used to draw a polygon around the area that requires a fence move. The outline of the polygon is in green. | Digitizing line segments to help the analyst perform fence moves correctly. |
- Zoom to the area of interest.
- Draw a polygon around the area that requires the fence move.
- Change the shading of the feature class so that it has no fill.
- Commit the polygon as an error to the table.
- Enter a custom description such as: “Fence move area.”
- Add reference line segments for the “to” and “from” positions
of
lines. Add sufficient reference points
so an analyst understands how features need to be moved and/or rotated.
- Use the polyline tool to trace over a segment of the feature in its current location.
- Commit the sketch to the error table.
- Enter custom error description: Reference “from.”
- Use the polyline tool to trace over a portion of the destination area to indicate the “to.”
- Commit the sketch to the error table.
- Enter custom error description: Reference “to.”
- Repeat the process until there are sufficient reference points for the fence move.
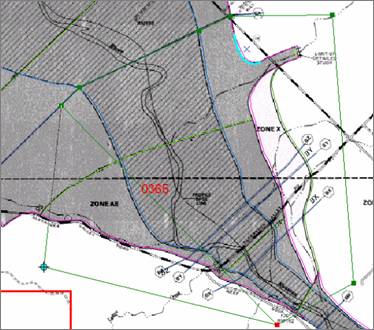
Flag to check tie-ins
A fence move has been made but tie-ins need to be determined by an engineer.
- Zoom to the area of interest.
- Draw a polygon around the area that needs attention.
- Change the shading of the feature class so that it has no fill.
- Commit the polygon as an error to the table.
- Enter a custom description such as “EGR specify tie-ins.”
Add attribute information
Add BFE elevations from an engineering table.
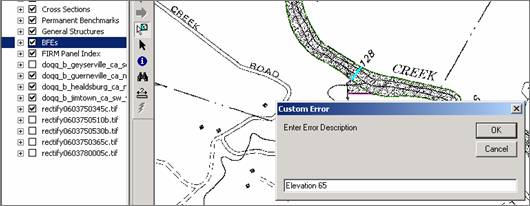 |
| After selecting a BFE, the feature is committed to the error table. Provide the correct elevation information in a custom description. |
- Zoom to the area of interest.
- Set selectable layers to BFE.
- Use the Select and Identify Features Tool or the Select Tool to make a selection.
- Commit selected feature to error table.
- Add custom description such as “Elev 65.”
- Repeat for other features requiring attribute data.
Edit an attribute
Rename a cross section
 |
| A cross section requiring an attribute has been selected. Enter the attribute value in a custom error description after committing the selected feature to the error table. |
- Zoom to area of interest.
- Set selectable layers to cross sections.
- Use the Select and Identify Features Tool or the Select Tool to make a selection.
- Commit the selected feature to the error table.
- Select the error description Change NAM:
- Enter the name or attribute value that should be applied to the selected feature.
Edit many attributes
Rename many cross-sections along a reach
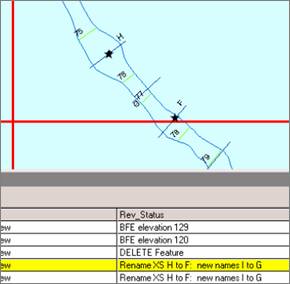 |
The errors shown on the Cross
Sections H and F were visited, leaving the star-shaped graphic locators. |
- Zoom to the area of interest.
- Use the point notepad tool to place a point on the first cross section in the range that needs to be renamed.
- Commit the point to the error table.
- Add a custom description such as “XS BH through BL rename to BJ through BN.”
- Use the Duplicate Error tool to create another instance of the error record that refers to a new location.
- Use the pointer tool to place a point on the last cross section that needs to be renamed. Note that the error description is the same and cannot be edited in the error table.
- Visit the two errors to verify that the star locator symbols are
showing.
Note: The Duplicate Error tool can only be used with the Point Notepad tool.
Verify error correction
Review the edits that have been made to the data based on the errors logged.
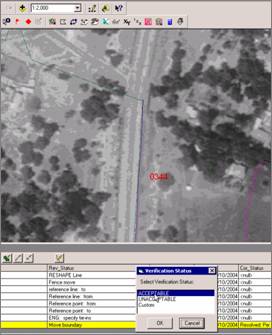 |
After zooming to the scale at which you want to verify the edits that have been made, click on the Error Verification tool and provide a status for the edit. |
- Right click and visit the error.
- Zoom to a reasonable extent by using the Zoom In, Zoom Out, and Pan tools and/or manually entering a scale (e.g. 1:2,000).
- Review the edit made.
- Click on the Verify Correction button.
- Classify the edit as acceptable or unacceptable or provide a custom note.
Trouble - Shooting
Problem: I inadvertently deleted a record from the error table.
Solution: A back-up error table is created within each ReViewer session. It contains a record of each error logged and can be used to restore deleted records. The table shows a “delete” status for any records that were deleted from the error table.
- Open the back-up table by right-clicking anywhere on the error table records and selecting Open Back-up Table from the list. The back-up table will appear in your ArcMap project. Scroll to the right on the back-up error table so that you can determine which error to copy.
- Right-click on the appropriate error record in the back-up table. Select Copy from the options. This will copy the record directly into the error table, so you do not need to “paste” it into the error table. If you have not already done so, delete the error record from the error table that has the incorrect information.
Problem: The error description that I entered for an error needs to be changed.
Solution: Unfortunately, it is not possible to edit the fields in the error table. You should delete the incorrect entry and create a new record for the error.
Problem: The information that I entered for an error record is incorrect.
Solution: You can copy the incorrect error record from the back-up error table to your working error table. Only the original error information will show.
- Identify the error number (ErrNum) of the record in which you made the incorrect entry. Let’s say the ErrNum of the record of interest is 8.
- Open the back-up table by right-clicking anywhere on the error table records and selecting Open Back-up Table from the list. The back-up table will appear in your ArcMap project.
- Locate the record with ErrNum 8 in the back-up table. Scroll to the right to make sure that you are looking at the record that contains erroneous information.
- Right-click on the record and select Copy from the options. This will place a copy of the record into the error table. You will see a new record created in the back-up table with a new ErrNum and a status that reads “Copied from Record #8.” The new record that appears in the back-up and error tables will show only the information entered when the error was first committed to the table.
- Close the back-up table.
- Enter the correct error correction / correction validation information and Delete the old, incorrect record.
Problem: I ran Batch Validate on a feature class or selected set of features without any problem. I want to run Batch Validate again, this time on new features or some additional features. When I launch the batch validation, the features I want to have checked are not selected. Batch Validate is not detecting the features.
Solution: You must clear the selection before performing a new batch validation. The selection set that has been created will be checked until you create a new selection set. Clear all selected features by choosing Clear All Selected Features from ArcMap’s Select dropdown menu. Make sure your selectable layers are set according to your needs. Launch Batch Validate and choose the checks you want to run.
Problem: You try to visit an error and get the following error message:
Solution: Recall that the error table does not store spatial data for an error record. The record points to a feature class, either in the Table of Contents or in a notepad feature class in the Data ReViewer session geodatabase. If you remove a feature class from the Table of Contents to which an error record points, you will receive the error message above.
- If the feature class is a notepad feature class created using the Polygon, Polyline, or Point Notepad tools, use the Load Notepad Feature Class tool to load the notepad feature class(es) from the ReViewer session that holds the feature classes. Look at the Location field in the error table to see the path name – it will include the name of the ReViewer session in which it is stored.
- If the feature class is one of the DFIRM data layers, use the DFIRM Layer Data Loader to add the appropriate feature class back into the ArcMap project.
Problem: I ran batch validate and got the following message box:
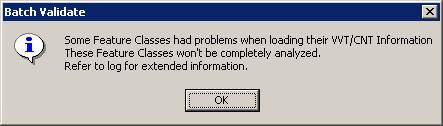
Solution: There are no batch validation checks for the Annotation layers. Change your Selectable Layers settings so that these layers are not selectable. Clear the existing selection and re-launch Batch Validate.
Contacts
If you need assistance with this tool, please contact the representative at your local RMC.
REGIONAL - NSP MOD TEAM CONTACT LIST
| NAME | ROLE | PHONE | |
|---|---|---|---|
| REGION I | |||
| Brent McCarthy | Lead | Brent.McCarthy@mapmodteam.com | (336) 240-7339 |
| Jeffrey Burm | GIS/Mapping | JeffBurm@mapmodteam.com | (517) 482-4930 x4752 |
| REGION II | |||
| Rich Cassin | Operations Manager | Rich.Cassin@mapmodteam.com | (914) 333-5366 |
| Michael Crino | GIS/Mapping | mcrino@mbakercorp.com | (718) 482-9945 |
| REGION III | |||
| Mike Conaboy | Operations Manager | mconaboy@mbakercorp.com | (609) 734-7922 |
| Lee Brancheau | Senior GIS Manager | lbrancheau@mbakercorp.com | (609) 734-7912 |
| REGION IV | |||
| Stephen King | Operations Manager | Stephen.King@mapmodteam.com | (678) 459-1010 |
| Kagan Kuyu | GIS/Mapping | Kagan.Kuyu@mapmodteam.com | (678) 459-1041 |
| REGION V | |||
| Sujata Banerjee | Business Manager | Sujata.Banerjee@mapmodteam.com | (312) 575-3902 |
| Pam Coye | GIS/Mapping | Pam.Coye@mapmodteam.com | (312) 575-3913 |
| REGION VI | |||
| Dan Hoecker | Operations Manager | Dan.Hoecker@mapmodteam.com | (940) 783-4155 |
| Phil Nguyen | GIS/Mapping | pxnguyen@mbakercorp.com | (940) 783-4121 |
| REGION VII | |||
| Matthew Koch | Operations Manager | mkoch@watershedconcepts.com | (816) 502-9420 x4952 |
| Rod Odom | GIS/Mapping | rodom@watershedconcepts.com | (816) 502-9420 x4957 |
| REGION VIII | |||
| David Jula | Operations Manager | David.Jula@mapmodteam.com | (720) 514-1100 |
| Mike Garner | GIS/Mapping | Mike.Garner@mapmodteam.com | (720) 514-1105 |
| REGION IX | |||
| Travis Clark | Business Manager | Travis.Clark@mapmodteam.com | (510) 879-0950 |
| Michael Skowronek | GIS/Mapping | Michael.Skowronek@mapmodteam.com | (510) 879-0958 |
| REGION X | |||
| Michael Morgan | Business Manager | Mike.Morgan@mapmodteam.com | (206) 344-3891 |
| Timothy Witten | GIS/Mapping | wittentd@bv.com | (206) 344-3891 |
Appendix A – Batch Validation Check Summaries
Overview
Each of the batch validation extensions is tied to a feature class. To see the checks that will be run for a feature class that appears in the batch validate window, select the Condition Table (CNT) type of validation, and select the name of the feature class. You will see the names of the checks associated with that feature class.
An explanation of each check is provided in this appendix. Descriptions are organized according to the feature class to which the check is tied.
Errors detected are written to the batch validate log file. It can be opened when you finish running batch validate or can be retrieved with the Open Log File tool, which is available on the Data Reviewer Extension toolbar. See the section on Batch Validation in this user guide for more information about how errors are logged and how to use the error log file and the error table to locate and correct errors.
Checks tied to the FIRM Panel Index (S_FIRM_PAN)
Complex Condition Table Checks
These checks compare multiple data values within or between datasets. Some checks are spatial, and some are based solely on attribute data. Note that some of these checks should be run on the entire spatial extent of the data. Before running them, zoom to the extent of the FIRM Panel Index.
COMPARE_EFFECTIVE_DATES
Entire dataset, Run at GPO
stage only
At GPO stage, run this check to ensure that the recent date entries (RECENT_DAT in L_COMM_INFO) are the same as the study’s effective date (EFF_DATE in S_FIRM_PAN) for each community listed in L_COMM_INFO.
LARGEST_PANEL_NUMBER
Entire dataset
Compares the largest panel number in the Study Info table (STUDY_INFO) with the largest number in the FIRM Panel Index. If the numbers are not the same, an error is returned.
CHECK_JURISDICTION_TYPE
Entire
dataset
Checks that the Study Info table does not include the "AND INCORPORATED AREAS" as a jurisdiction type unless the project is countywide (the DFIRM ID must end with a "C").
COMPARE_ID_LINKS
Entire dataset
Compares the association of lookup tables to feature class attribute tables. An error message will be returned if a record exists in a lookup table (L_) but there is no corresponding record in a spatial table (S_) and vice versa.
MIN_MAX_COMPARISON
Entire dataset
Reviews the entries in the BFE (S_BFE), Flood Hazard Area (S_FLD_HAZ_AR), Cross Section (S_XS), and Coastal Transect Line (S_CST_TSCT_LN) feature tables. Selected fields are checked to ensure that the minimum and maximum values are reasonable. This check is particularly useful for identifying any typographical errors that might have been made in data entry.
ARC_MIN_LENGTH
Entire
dataset
Checks ensure that arc lengths are at least 1 meter long. If an arc is between 0.2 and 1 meter, a warning message will be returned. If an arc is less than 0.2 meters, an error message is returned.
The following layers will be checked: S_BFE, S_CST_TSCT_LN, S_FLD_HAZ_LN, S_GEN_STRUCT, S_LOMR_LN, S_OVRBNK_LN, S_PFD_LN, S_PLSS_LN, S_POL_LN, S_PROFILE_BASLN, S_SHORE_LN, S_TRNSPORT_LN, S_WTR_LN, and S_XS
L_CST_MODEL_EFF_DATE
Entire dataset
This check ensures that the dates in the Coastal Model lookup table (L_CST_MODEL) are not later than the study’s effective date (EFF_DATE in L_CASE_INFO)
L_HYDRA_MODEL_EFF_DATE
Entire
dataset
Compares values in L_CASE_INFO and L_HYDRA_MODEL to make certain that the dates in L_HYDRA_MODEL are not later than the study's effective date.
L_HYDRO_MODEL_EFF_DATE
Entire dataset
Compares values in L_CASE_INFO and L_HYDRO_MODEL to make certain that the dates in L_HYDRO_MODEL are not later than the study's effective date.
L_MT1_LOMC_PANEL
Entire dataset
Checks whether the panel number in L_MT1_LOMC matches a panel number in the FIRM Panel Index for the community or county.
L_PAN_REVIS_PANEL
Entire dataset
Checks whether the panel number in L_PAN_REVIS matches a panel number in the FIRM Panel Index for the community or county.
S_GEN_STRUCT
View extent
Compares the structure name field (STRUCT_NM) with the structure type field (STRUCT_TYP) in the General Structures layer (S_GEN_STRUCT). A warning is given if the names are identical.
ATT_CHECK
Entire
dataset
Verifies that the panel numbers in FIRM Panel Index (S_FIRM_PAN) are valid, given the scale listed.
Valid Value Checks
These checks ensure that valid entries have been made in the FIRM Panel Index (S_FIRM_PAN) and Study Info (STUDY_INFO) tables.
FIRM Panel Index (S_FIRM_PAN_VVT_CHECK)
The following required fields must be populated: Unique ID (FIRM_ID), FIRM Panel Number (FIRM_PAN), Panel Number (PANEL), Panel Type (PANEL_TYP), Panel Scale (SCALE), Panel Suffix (SUFFIX), NW Latitude (NW_LAT), NW Longitude (NW_LON), SE Latitude (SE_LAT), SE Longitude (SE_LON), Community or County Identification Number (PCOMM), State FIPS (ST_FIPS), and Source Citation (SOURCE_CIT).
If applicable, the Panel Not Printed Reason (PNP_REASON) and the Effective Date (EFF_DATE) must be populated. Printed Panel Types (PANEL_TYP) cannot have a Panel Not Printed Reason. Finally, a check is made to ensure that the FIRM Panel Number (FIRM_PAN) is composed of the State FIPS, Community or County Identification Number, Panel Number, and Panel Suffix.
Study Info (STUDY_INFO_VVT_CHECK)
The following required fields must be populated: County Name (CNTY_NM), Countywide (CW_TF), Horizontal Datum (H_DATUM), Largest Panel Number (LG_PAN_NO), Only Panel Printed (OPP_TF), Projection (PROJECTION), State Name (STATE_NM), Study Info ID (STD_NFO_ID), Study Name (STUDY_NM), and Vertical Datum (V_DATUM). If the study is countywide, the Jurisdiction Type field (JURIS_TYP) must be populated. If the study is single jurisdiction, the jurisdiction type field must not be populated. If there is an entry for the projection (PROJECTION), the projection zone (PROJ_ZONE) field must be populated. If the study is countywide, there cannot be an entry in the Study Prefix field (STUDY_PREFIX). If the study is countywide, there must be a study prefix entry. The largest panel number listed (TO_NUMBER) must be greater than 0.
Condition Table Error Checks
These checks ensure that the entries in the lookup tables are valid, and placeholders such as NP, NSPNULL, -8888, and 88880808 are not used inappropriately.
Study_Info
The following required fields must be populated: Study Info ID (STD_NFO_ID), Study Name (STUDY_NM), State Name (STATE_NM), County Name (CO_NAME), Countywide (CW_TF), Largest Panel Number (LG_PAN_NO), Only Panel Printed (OPP_TF), Horizontal Datum (H_DATUM), Vertical Datum (V_DATUM), and Projection (PROJECTION). If applicable, the required fields CBRS Region (CBRS_REG), CBRS Phone (CBRS_PHONE), Jurisdiction Type (JURIS_TYP), Projection Zone (PROJ_ZONE), Study Prefix (STUDY_PRE), and Study Zipfile Name (STUDY_ZIP) cannot be populated with the placeholder "NP". Additional checks ensure that: the Largest Panel Number is greater than zero, the Study Prefix is only populated if the study is countywide, and the Projection Zone is populated if a Projection has been entered.
L_Aux_Data
The following required fields must be populated: Case Number (CASE_NO), Data Date (DATA_DATE), Data Filename (FILE_NM), Data ID (DATA_ID), Data Type (DATA_TYPE), and Metadata Filename (META_NM). If applicable, the required fields Contact Name (CONTACT), Contact Title (TITLE), Contact Address 1 (ADDRESS1), Contact Address 2 (ADDRESS2), Contact Address 3 (ADDRESS3), Contact City (CITY), Contact State (STATE), Contact Zipcode (ZIP), and Phone (PHONE) cannot be populated with "NP."
L_Case_Info
The following required fields must be populated: Case Number (CASE_NO), Case Description (CASE_DESC), Case Zipfile Name (CASE_ZIP), and Study Info ID (STD_NFO_ID).
L_Comm_Info
The following required fields must be populated: Community Info ID (COM_NFO_ID), Initial FIRM Date (IN_FRM_DAT), Initial ID Date (IN_ID_DAT), Initial NFIP Date (IN_NFIP_DAT), and those for Map Repository information (REPOS_ ADR1, REPOS_CITY, REPOS_ST, and REPOS_ZIP). If applicable, the Recent Panel Date (REC_DAT) and additional address line fields for the Map Repository (REPOS_ADR2, REPOS_ADR3) cannot be populated with the placeholders "88880808" or "NP".
L_Cst_Model
The following required fields must be populated: Case Number (CASE_NO), Coastal Model ID (CST_MDL_ID), Primary Frontal Dune (PFD_TF), Surge Model Effective Date (SURGE_EFF), Surge Model (SURGE_MDL), Surge Model Run Date (SURGE_DATE), Surge Model Zipfile Name (SURGE_ZIP), and Water Name (WTR_NM). If applicable, the fields Erosion Treatment (EROS_TF), Runup Model Run Date (RUNUP_DT), Wave Model Effective Date (WAVE_EFF), Wave Model Zipfile Name (WAVE_ZIP), Wave Setup Methodology (SETUP_METH), Wave Setup Run Date (SETUP_DATE), and Wave Height Run Date (WAVEHT_DT) cannot be populated with the placeholders "88880808" or "NP".
L_Hydra_Model
The following required fields must be populated: Case Number (CASE_NO), Hydraulic Model ID (HYDRA_ID), Hydraulic Model (HYDRA_MDL), Mydraulic Model Run Date (HYDRA_DATE), and Hydraulic Model Zipfile Name (HYDRA_ZIP).
L_Hydro_Model
The following required fields must be populated: Case Number (CASE_NO), Hydrologic Model ID (HYDRO_ID), Hydrologic Model (HYDRO_MDL), Hydrologic Model Run Date (HYDRO_DATE), and Hydrologic Model Zipfile Name (HYDRO_ZIP).
L_Media
The following required fields must be populated: Object ID (OBJ_ID), Object Table (OBJ_ID), Media ID (MEDIA_ID), Media Date (MEDIA_DATE), Media Type (MEDIA_TYPE), Media Filename (MEDIA_PATH), and Description (DESCRIPTION).
L_MT1_LOMC
The following required fields must be populated: LOMC ID (LOMC_ID), LOMC Status (LOMC_STAT), FIRM Panel Number (FIRM_PAN), Case Number (CASE_NO), and LOMC Effective Date (EFF_DATE). LOMC Status cannot have a value of "effective".
L_Node_Disch
The following required fields must be populated: Frequency Interval (FREQUENCY), Discharge (DISCHARGE), Hydrologic Model ID (HYDRO_ID), Node Type (NODE_TYPE), Node ID (NODE_ID), and Discharge Unit (DISCHARGE_UNIT). Additional checks ensure that if Discharge is populated with the placeholder "NP", then the Discharge Unit is also populated with "NP", and vice versa.
L_Pan_Revis
The following required fields must be populated: Revision ID (REVIS_ID), FIRM Panel Number (FIRM_PAN), Revision Date (REVIS_DATE), and Revision Note (REVIS_NOTE).
L_Pol_Fhbm
The following required fields must be populated: FHBM ID (FHBM_ID), FHBM Date (FHBM_DATE), FHBM Note (FHBM_NOTE), and Community ID (CID).
L_Regression
The following required fields must be populated: Regression ID (REGR_ID), Subbasin ID (SUBBAS_ID), Regression Equation (REGR_EQN), and Regression Report (REGR_RPT).
L_Stn_Start
The required fields Station Start ID (START_ID) and Station Start Description (START_DESC) must be populated.
L_Storm_Curve
The following required fields must be populated: Curve ID (CURVE_ID), Storm ID (STORM_ID), Storm Duration (DURATION), and Time Unit (TIME_UNIT). If applicable, the fields Depth (DEPTH), Frequency Interval (FREQUENCY), Length Unit (LEN_UNIT), and Velocity Unit (VEL_UNIT) must not be populated with placeholder values. Values for Depth (DEPTH) cannot be negative, and if the value is greater than zero, a Length Unit (LEN_UNIT) must be entered. If a value has been entered for Rainfall Intensity (INTENSITY), it must be greater than zero and a Velocity Unit (VEL_UNIT) must be entered. If the value for Rainfall Intensity is -9999 or null, the field Velocity Unit must be unpopulated. If a Storm Duration is populated with a value other than "NP", the field Time Unit must also be populated. Otherwise, Time Unit must be populated with "NP".
L_Storm_Info
The required fields Subbasin ID (SUBBAS_ID), Storm ID (STORM_ID), and Storm Type (STORM_TYPE) must be populated. If applicable, the field Storm Description (STORM_DESC) cannot be populated with "NP".
L_Subbas_Disch
The following required fields must be populated: Subbasin ID (SUBBAS_ID), Discharge ID (DISCH_ID), Frequency Interval (FREQUENCY), and Discharge Unit (DISCH_UNIT). The required field Discharge (DISCHARGE) cannot be populated with a negative number, zero, or "-9999". However, if it is populated with a valid value, the Discharge Unit (DISCH_UNIT) field must be populated. Discharge Unit value should be "NP", when the Discharge value is "-8888".
L_XS_Ratings
The following required fields must be populated: XS Ratings ID (XS_RATG_ID), XS Number (XS_NO), XS Line ID (XS_LN_ID), Hydrologic Model ID (HYDRO_ID), Hydraulic Model ID (HYDRA_ID), Frequency WSEL (FREQ_WSEL), Frequency (FREQUENCY), Vertical Datum (V_DATUM), Length Unit (LEN_UNIT), and Effective Models (EFF_MODELS). If applicable, the required fields Discharge Unit (DISCH_UNIT) and Reach Name (REACH_NM) cannot be populated with the placeholder "NP". Also, if applicable, the required field Frequency Discharge (FREQ_Q) cannot be negative, "-8888", or zero. If Frequency Discharge is populated, then the field Discharge Unit must also be populated. Frequency WSEL (FREQ_WSEL) may not be negative, and if it is populated, the fields Length Unit and Vertical Datum both must be populated. However, these fields should not be populated, if the field Frequency WSEL is not populated.
Checks Tied to Other Feature Classes
The following checks can be run to validate the attribute values entered in each attribute table for the corresponding feature class.
BFEs (S_BFE_CNT_CHECK)
The following fields are required and must be populated: Unique ID (BFE_LN_ID), Base Flood Elevation (ELEV), Length Units (LEN_UNIT), Source Citation (SOURCE_CIT), and Vertical Datum (V_DATUM). The Base Flood Elevation (ELEV) values must be greater than or equal to zero.
Cross Sections (S_XS_CNT_CHECK)
The following fields are required and must be populated: Unique ID (XS_LN_ID), Length Units (LEN_UNIT), Source Citation (SOURCE_CIT), Station Start ID (START_ID), Stream Station (STREAM_STN), Vertical Datum (V_DATUM), Regulatory Water Surface Elevation (WSEL_REG), Water Name (WTR_NM), and Cross Section Line Type (XS_LN_TYP). For Enhanced Studies, all of the above fields are required and must be populated, as well as, the following additional fields: Area Unit (AREA_UNIT), Bed Elevation (BED_ELEV), Top Width (TOP_WIDTH), Velocity Unit (VEL_UNIT), Velocity (VELOCITY), and Cross Section Area (XS_AREA). The field Cross Section Letter (XS_LTR) is only required when the value for Cross Section Line Type (XS_LN_TYP) is “Lettered”. However, “NP” is an invalid value for Cross Section Letter (XS_LTR). Additionally, the values for the following fields must be greater than zero, or -8888 should be used for not populated records: Top Width (TOP_WIDTH), Velocity (VELOCITY), and Cross Section Area (XS_AREA). The values for the fields Bed Elevation (BED_ELEV) and Regulatory Water Surface Elevation (WSEL_REG) must be greater than or equal to zero, or -8888 should be used for not populated records.
Coastal Barrier Resources System (S_CBRS_CNT_CHECK)
The following fields are required and must be populated: Unique ID (CBRS_ID), CBRS true/false (CBRS_TF), and Source Citation (SOURCE_CIT). The fields CBRS Type (CBRS_TYP) and CBRS Date (CBRS_DATE) are only required and should only be populated when the value for CBRS true/false (CBRS_TF) is “T”. However, “NP” is an invalid value for CBRS Type (CBRS_TYP), and “88880808” is an invalid value for CBRS Date (CBRS_DATE).
Coastal Transect Gage (S_CST_GAGE_CNT_CHECK)
For Enhanced Studies the following fields are required and must be populated: Unique ID (GAGE_ID), Agency (AGENCY), Gage End Recording Date (END_PD), Gage Name (GAGE_NM), Gage Type (GAGE_TYPE), Source Citation (SOURCE_CIT), Gage Recording Start Date (START_PD), Wind Direction (WDDIR_TF), Wind Speed (WDSPD_TF), and Wave Direction (WVDIR_TF). The fields Recording Interval (REC_INTVL) and Time Unit (TIME_UNIT) are only required and should only be populated when the value for Gage Type (GAGE_TYPE) is “Fixed Interval”. Additionally, when the following fields are applicable, and therefore required, “NP” is an invalid value: Coastal Model ID (CST_MD_ID), Recording Interval (REC_INTVL), and Time Unit (TIME_UNIT). Also, the values for both Wind Direction (WDDIR_TF) and Wind Speed (WDSPD_TF) must be “T” when the value for Gage Type (GAGE_TYPE) is either “Wind Direction” or “Wind Speed & Direction”.
Coastal Transect (S_CST_TSCT_LN_CNT_CHECK)
The following fields are required and must be populated: Unique ID (TRAN_LN_ID), Length Unit (LEN_UNIT), Source Citation (SOURCE_CIT), and Transect Number (TRAN_NO). For Enhanced Studies all of the above fields are required and must be populated, as well as, the following additional fields: Effective Study (EFF_TF), Left Range Direction (L_DIRECT), Left Range (L_RANGE), Location Description (LOC_DESC), Source Method (METHOD), Right Range Direction (R_DIRCT), Right Range (R_RANGE), Shoreline Roughness (SHR_ROUGH), Time Unit (TIME_UNIT), Vertical Datum (V_DATUM), VZone Extent (VZONE_EXT), X-Coordinate (XCOORD), and Y-Coordinate (YCOORD). Additionally, when the fields Coastal Model ID (CST_MDL_ID) or Erosion Methodology (EROS_METH) are applicable, and therefore required, “NP” is an invalid value. The field Shown on FIRM (SHOWN_FIRM) must be populated with a domain value. All of the values for the following fields must be greater than or equal to 0, and -8888 is an invalid value: Controlling Wave Height (CON_HT), Controlling Wave Period (CON_PD), Mean Wave Height (MEAN_HT), Mean Wave Period (MEAN_PD), Wave Setup Depth (SETUP_DEPTH), Significant Wave Height (SIG_HT), Significant Wave Period (SIG_PD), and Transect Number (TRAN_NO). Moreover, the values for the Left Range Direction (L_DIRECT) and Right Range Direction (R_DIRECT) must be between -359 degrees and 359 degrees.
General Structures (S_GEN_STRUCT_CNT_CHECK)
The following fields are required and must be populated: Unique ID (STRUCT_ID), Source Citation (SOURCE_CIT), Structure Type (STRUCT_TYP), and Water Name (WTR_NM). Additionally, when the field Structure Name (STRUCT_NM) is applicable, and therefore required, “NP” is an invalid value for that field.
Flood Hazard Area (S_FLD_HAZ_AR_CNT_CHECK)
The following required fields must be populated: Unique ID (FLD_AR_ID), Flood Zone (FLD_ZONE), Special Flood Hazard Area (SFHA_TF), and Source Citation (SOURCE_CIT). If applicable, the following fields cannot be populated with the placeholder “NP”: Length Unit (LEN_UNIT), Velocity Unit (VEL_UNIT), and Vertical Datum (V_DATUM) in standard databases and Coastal Model ID (CST_MDL_ID) and Hydrologic Model (HYDRO_ID) in enhanced databases.
Only AR zones can have entries made for AR Revert Zone (AR_REVERT). If the AR zone is coded as AE, AH, or VE, an AR Revert BFE (BFE_REVERT) can be entered. If the AR zone is coded as AO, an AR Revert Depth (DEP_REVERT) can be entered. Several checks are made to make sure that no entries are made in these fields if the Flood Zone (FLD_ZONE) is not of an 'AR' type. Checks are run to confirm that entries are not populated with placeholders and have the correct value (-9999) entered if the true number is less than zero.
Length unit (LEN_UNIT) values can be entered for zones AE, AH, VE, and AO that are identified in the AR Revert BFE (BFE_REVERT), AR Revert Depth (DEP_REVERT), or Flood Zone (FLD_ZONE) fields. For zones other than AO, a Static BFE or an AR Revert BFE must be listed in order to populate the length unit field.
Additional checks ensure that a Vertical Datum (V_DATUM) is entered when the Flood Zone (FLD_ZONE) or AR Revert Zone (AR_REVERT) is AE, AH, or VE and that no zones other than these are associated with a Static BFE.
Depth (DEPTH) and Velocity (VELOCITY) fields can only be populated for AO zones. Standard Floodways (FLOODWAY) can only be populated for AE zones.
There are also checks to make sure that if a zone is a 1% annual chance flood hazard, the SFHA value is "true" and vice versa.
Flood Hazard Line (S_FLD_HAZ_LN_CNT_CHECK)
The Unique ID (FLD_LN_ID) and Line Type (LN_TYP) fields are required and must be populated.
Base Index (S_BASE_INDEX_CNT_CHECK)
The following fields are required and must be populated: Unique ID (BASE_ID), Base Date (BASE_DATE), Base Filename (FILENAME), and Source Citation (SOURCE_CIT).
Permanent Benchmarks (S_PERM_BMK_CNT_CHECK)
The following fields are required and must be populated: Unique ID (BM_ID), Permanent ID (PID), and Source Citation (SOURCE_CIT).
PLSS Area (S_PLSS_AR_CNT_CHECK)
The following required fields must be populated: Unique ID (PLSS_AR_ID), Section Number (SECT_NO), and Source Citation (SOURCE_CIT). If applicable, the fields Range (RANGE) and Township (TWP) are required. Additional checks are done to ensure that, if there is a value for Section Number (SECT_NO), the number is within the valid range and the fields Township (TWP) and Range (RANGE) are populated. Additionally, the Shown on FIRM (SHOWN_FIRM) field must be populated with a domain value.
Water Area (S_WTR_AR_CNT_CHECK)
The following required fields must be populated: Unique ID (WTR_AR_ID), Water Type (WATER_TYP), Water Name (WTR_NM), and Source Citation (SOURCE_CIT). A check is also done to ensure that the Water Type (WATER_TYP) entered is valid for a water area.
Water Line (S_WTR_LN_CNT_CHECK)
The following required fields must be populated: Unique ID (WTR_LN_ID), Water Type (WATER_TYP), Water Name (WTR_NM), Channel Representation (CHAN_REP), and Source Citation (SOURCE_CIT). A check is also done to ensure that if the Water Type (WATER_TYP) field is not populated ("NP"), then the field Channel Representation (CHAN_REP) is also not populated ("NP").
Transport Line (S_TRNSPORT_LN_CNT_CHECK)
The following required fields must be populated: Unique ID (TRANS_ID), Transportation Type (TRANS_TYP), Primary Feature Name (FEAT_NM1), Name Type (NM_TYP), Road Status (RD_STAT), and Source Citation (SOURCE_CIT). Also, if applicable, the following required fields must be populated: Secondary Feature Name (FEAT_NM2), Tertiary Feature Name (FEAT_NM3), Prefix (PREFIX), and Suffix (SUFFIX). The fields Shown on FIRM (SHOWN_FIRM) and Shown on INDEX (SHOWN_INDEX) must be populated with domain values. Additionally, a check is made to ensure that only valid road transportation types have the Name Type (NM_TYP) and Road Status (RD_STAT) fields populated.
Political Line (S_POL_LN_CNT_CHECK)
The following required fields must be populated: Unique ID (POL_LN_ID), Line Type (LN_TYP), and Source Citation (SOURCE_CIT). A check is also made to ensure that the Line Type (LN_TYP) entered is valid for a political line.
Political Area (S_POL_AR_CNT_CHECK)
The following required fields must be populated: Unique ID (POL_AR_ID), Primary Political Area Name (POL_NAME1), State FIPS (ST_FIPS), County FIPS (CO_FIPS), Community Number (COMM_NO), Community ID (CID), and Area Not Included (ANI_TF). If applicable, the fields Community Info ID (COM_NFO_ID) and Secondary Political Area Name (POL_NAME2) cannot be populated with the placeholder "NP". Checks are done to ensure that the Community Number (COMM_NO), County FIPS (CO_FIPS), and Community ID (CID) each have the correct number of characters. The Community ID (CID) is also checked to ensure that it is comprised of the State FIPS (ST_FIPS) and the Community Number (COMM_NO) values. Additionally, a check confirms that the Community Info ID (COM_NFO_ID) is populated if the community has a Community ID (CID).
PLSS Line (S_PLSS_LN_CNT_CHECK)
The required fields Unique ID (PLSS_LN_ID) and Source Citation (SOURCE_CIT) must be populated. If applicable, the fields West Range (W_RANGE), East Range (E_RANGE), North Township (N_TWP), and South Township (S_TWP) cannot be populated with the placeholder "NP". The Line Type (LN_TYP) field is checked to ensure that the type entered is appropriate for PLSS lines.
Profile Baseline (S_PROFIL_BASLN_CNT_CHECK)
The Profile Baseline (S_PROFIL_BASLN) table is populated for enhanced databases. The following required fields must be populated: Unique ID (BASELN_ID), Water Type (WTR_TYP), Water Name (WTR_NM), and Source Citation (SOURCE_CIT). If applicable, the values for Downstream Node (DN_NODE) and Upstream Node (UP_NODE) must not be populated with "NP", and the values must be appropriate given the entries in the Water Type (WTR_TYP) field. Also, if applicable, the Hydrologic Routing Method (ROUTE_METH) must not be populated with the placeholder "NP". Additionally, the field Shown on FIRM (SHOWN_FIRM) must be populated with a domain value.
Quad Index (S_QUAD_INDEX_CNT_CHECK)
The following required fields must be populated: Unique ID (QUAD_ID), Quad Name (QUAD_NM), Quad Number (QUAD_NO), and Source Citation (SOURCE_CIT). The Quad Number (QUAD_NO) must be eight digits in length.
River Mark (S_RIV_MRK_CNT_CHECK)
The following required fields must be populated: Unique ID (RIV_MRK_ID), River Mark Number (RIV_MRK_NO), Station Start ID (START_ID), and Source Citation (SOURCE_CIT).
Shoreline (S_SHORE_LN_CNT_CHECK)
The Shore Line (S_SHORE_LN) feature class table is populated for enhanced databases. The following required fields must be populated: Unique ID (SHR_LN_ID), Shoreline Type (SHRLN_TYP), Vertical Datum (V_DATUM), and Source Citation (SOURCE_CIT).
Station Start (S_STN_START_CNT_CHECK)
For enhanced databases, the following required fields must be populated: Unique ID (STRT_PT_ID), Station Start ID (START_ID), and Source Citation (SOURCE_CIT).
Precipitation Gage (S_PRECIP_GAGE_CNT_CHECK)
For enhanced databases, the following required fields must be populated: Unique ID (PRECIP_ID), Agency (AGENCY), Case Number (CASE_NO), End Date (END_PD), Precipitation Gage ID (GAGE_ID), Gage Type (GAGE_TYPE), Start Period (START_PD), and Source Citation (SOURCE_CIT). If applicable, the required field Time Unit (TIME_UNIT) must not be populated with a placeholder ("NP"). For enhanced studies, the Recording Interval (REC_INTVL) and the Time Unit (TIME_UNIT) fields must be populated for “Fixed Interval” gages. If the Gage Type is not “Fixed Interval”, then the Recording Interval value and the Time Unit value must be “Null”.
PFD Line (S_PFD_LN_CNT_CHECK)
For enhanced databases, the required fields Unique ID (PFD_ID) and Source Citation (SOURCE_CIT) must be populated.
Water Gage (S_WATER_GAGE_CNT_CHECK)
For enhanced databases, the following required fields must be populated: Unique ID (GAG_WTR_ID), Agency (AGENCY), Case Number (CASE_NO), End Period (END_PD), Precipitation Gage ID (GAGE_ID), Gage Type (GAGE_TYPE), Source Citation (SOURCE_CIT), Start Period (START_PD), Recording Interval (REC_INTVL), and Time Unit (TIME_UNIT).
Subbasins (S_SUBBASINS_CNT_CHECK)
For enhanced databases, the following required fields must be populated: Unique ID (SUBBAS_ID), Node ID (NODE_ID), Subbasin Name (SUBBAS_NM), and Source Citation (SOURCE_CIT).
Overbank Line (S_OVRBNKLN_CNT_CHECK)
For enhanced databases, the following required fields must be populated: Unique ID (OVRBNK_ID), Overbank Side (OBNK_SIDE), Water Name (WTR_NM), and Source Citation (SOURCE_CIT).
Nodes (S_NODES_CNT_CHECK)
For enhanced databases, the required fields Unique ID (NODE_ID) and Source Citation (SOURCE_CIT) must be populated.
LOMRs (S_LOMR_CNT_CHECK)
The following required fields must be populated: Unique ID (LOMR_ID), Case Number (CASE_NO), Effective Date (EFF_DATE), LOMR Scale (SCALE), and Source Citation (SOURCE_CIT). The field Shown on FIRM (SHOWN_FIRM) must be populated with a domain value. For enhanced databases, the required field LOMR Status (STATUS) must be populated with "effective", "incorporated", or "superseded".
Label Points (S_LABEL_PT_CNT_CHECK)
The following required fields must be populated: Unique ID (LABEL_ID), Degrees (DEGREES), Label (LABEL), and Label Type (LABEL_TYPE).
Label Leaders (S_LABEL_LD_CNT_CHECK)
The required fields Unique ID (LEADER_ID) and Label Type (LABEL_TYPE) must be populated.
LOMR Line (S_LOMR_LN_CNT_CHECK)
The required field Unique ID (LOMR_LN_ID) must be populated, and the field Shown on LOMR (SHOWN_LOMR) must be populated with a domain value.